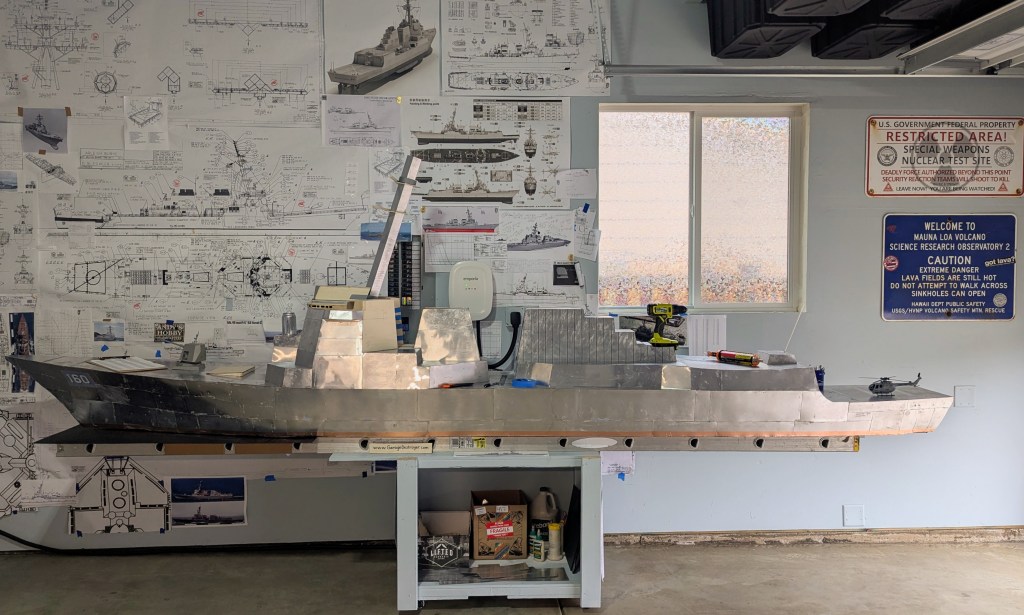
14 foot long one of a kind 1/35 scale display model of a United States Navy Arleigh Burke class DDG destroyer warship, month 7 of build by nick hoke
Behold! Continuing, current, and regular in-progress updates on my first ever attempt at a scratch-built 1:35 scale static waterline display warship model of a US Navy Arleigh Burke class DDG-51 [79] type destroyer. This hobby project is taking over half my garage, measuring in at a barely manageable 4.5 meters long. Or if you prefer freedom units it’s 173 inches from fo’c’sle to fantail. Construction started in Pierce County, Washington, in the shadow of Mt. Rainier and under the occasional and random flight paths of the tight formation flying low-altitude blacked-out and transponders-off JBLM 160th Night Stalkers. This fever dream of a passion project commenced in July of 2025 by Nick Hoke, retired from a 27 year long career as a small town police patrol K9 officer in the PNW. Before that there had been a voluntary military enlistment and overseas adventures in the 1980’s navy as a helmsman on a ’60’s era Leahy-class guided missile cruiser. Yeah, they let me drive the boat. Like, a lot. One of reasons why I still have a sleep deficit from a deployment into the Persian Gulf participating in Operation Earnest Will, which was the first time the pointy end of the United States navy spear had been sent into the Persian Gulf to.. you know.. regulate the flow of oil. Then my ship spent a fair amount of time stateside in drydock at what is now Huntington Ingalls Industries. For a scheduled refit/NTU, not because of my steering. And before all that, back in the analog days before selfies CD’s cell phones jetpacks colonoscopies and microplastics I was a teenage USN Sea Cadet at the Puget Sound Naval Shipyard in Bremerton, Washington. That was.. uh.. ffffffuuu.. over forty years ago, back when Sea Cadets could get special behind the scenes tours of the Bangor submarine base including the inside decks of an SSBN, the Trident Training Facility, and a memorable drive around the perimeter of the expansive and heavily guarded weapons storage area of the Strategic Weapons Facility Pacific that the lieutenant in charge of tour conceded would be a really good place to store about a thousand ICBM W76 nuclear warheads, if they had any. Years later I was a state certified marine patrol police officer on a first gen SAFE boat, inflicting law and order in Liberty Bay, and I trained with my Belgian Malinois at the Seattle USCG station and at the USCG Air Station Port Angeles. So that’s my origin story in connection to matters of naval relevance and ship building. I like big boats. Now it’s August 2026, month 13 of my build. It’s doing a pretty good of distracting me occasionally from the jarring reality of whatever this absurd timeline is. Therapist approved. Also cheaper. Welcome aboard to my build a boat blog.
build progress, month 12
JULY 2025
The journey begins. An idea is born: Build a scale model warship. In the garage. How? I don't know, we're going to learn how to do this as we go along. First step was to submit a proposal to the proper authorities, of course. Permission was granted, funds authorized, and the project was launched. I started with research and development. I scoured the internet and curated a couple thousand good reference photos from public open sources. My presentation to my significantly better other half was basically "Hey honey I was thinking I'd like to build a model boat in the garage." My wife replied with quick "Uh..okay," in a pretty agreeable tone. Me: "Cool, thanks. it's gonna be a warship." Long silence, then she said, in a bit quieter tone.. "It's going to be big, isn't it?"
Frankenbench was resurrected, retooled and repurposed with a bolted-on fabulously lightweight level and rigid extension ladder that gave one up for team and is now missing the top 12 foot section. By the way, if you're looking at this on your phone.. it will look so much better on a bigger screen because this model ship is stem to stern almost 15 feet long.
There are now almost 80 of these DDG hulls commissioned and out on patrol, and more are still being built, so there are almost enough public photos and images of them for me to find and study and reconcile different measurements and dimensions. I say "different" because I had noticed pretty quickly that between all the ship's different refits and flights, blocks and mods and baselines and upgrades and SLEPS and MSRAs, every individual ship now has at least one noticeably different feature somewhere; many are minor, some are major. Built over decades now in two different shipyards and upgraded in a dozen other different shipyards and worked on by hundreds of major subcontractors, there is enough structural variance - that includes even paint color schemes and transom typography (!) - to give me a bit of leeway to relax my margin of error accuracy to roughly ±0.84% transversely and ±0.17% longitudinally and still confidently present the most accurate 1/35 scale model of this kind.
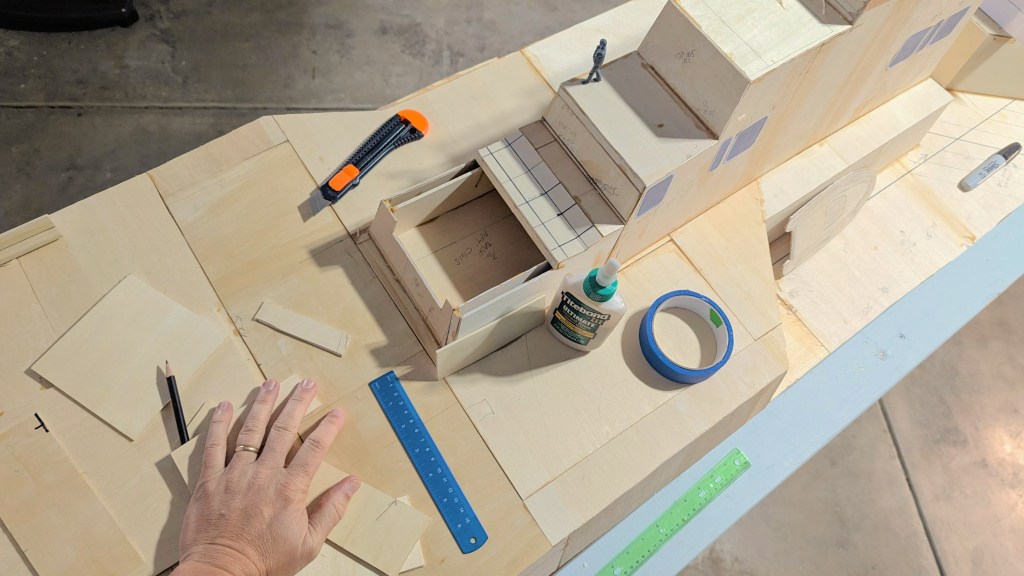
You've seen those little plywood laser cut decoration contraptions things, made out of hobby plywood? Yeah, that wood is sold in handy 12" x 12" square sheets, 3 mm thick. Just about perfect for building a boat like this. Cuttable by hand with cheap disposable utility knives = no airborne sawdust. I wound up using 13 dozen of those wood square sheets and two dozen of the knives. And five quarts of wood glue. Note: the wood does not cut like super easy; one must apply a bit of pressure and use two or three passes to cut clean through. As you can see in this photo, I had no idea what I was doing.
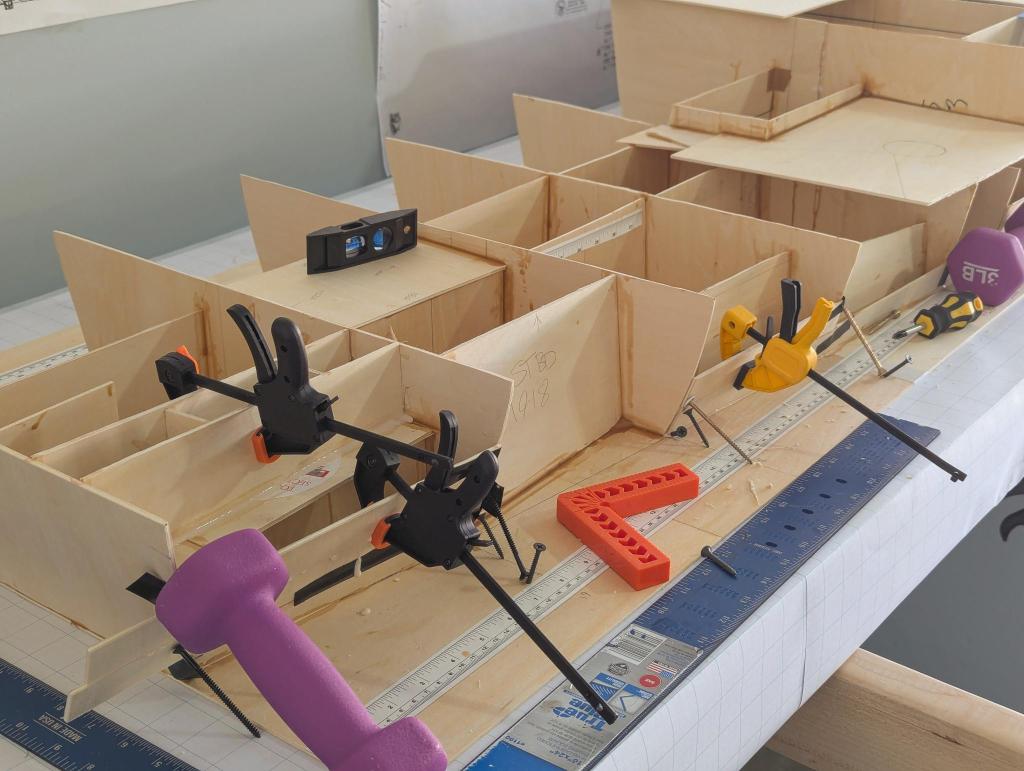
This was Phase I: The part with all the wood. Frugality is one of my evident signature techniques. I could not find anywhere in my garage any kind of laser cutting or laser measuring machines, and there was no CAD anything. Only in my dreams. Also for research and scaling purposes the AI programs I was using back then were helpful, but nothing compared to like nowadays. So this first phase was all done old-school Gen X style: I cut a few hundred pieces of wood and metal one at a time by hand into specifically measured different shapes to millimeter accuracy and glued them all together into a growing configuration of awkward looking weirdness that would have at least made my elementary school art teachers proud. I don't know what my middle school and high school woodshop teachers would think of this. They'd probably suggest using some jigs or clamps or something to hold the wood that I'm cutting. You know, for like, safety reasons.
Does one need a huge area to build a ship? No, not really. I mean sure, it would be nice, but like the shipbuilders at BIW, we're making it work with what we've got.
I'm not a fan of sawdust. None was generated. I wonder how future many ship models will be built like this one I'm doing - cutting and measuring by hand.  I suspect very few. It can be done, but I'd highly suggest using a laser. Or maybe a bandsaw.
If this site looks different than the last time you were here, yeah, I keep adding more text. And new photos, chronologically.
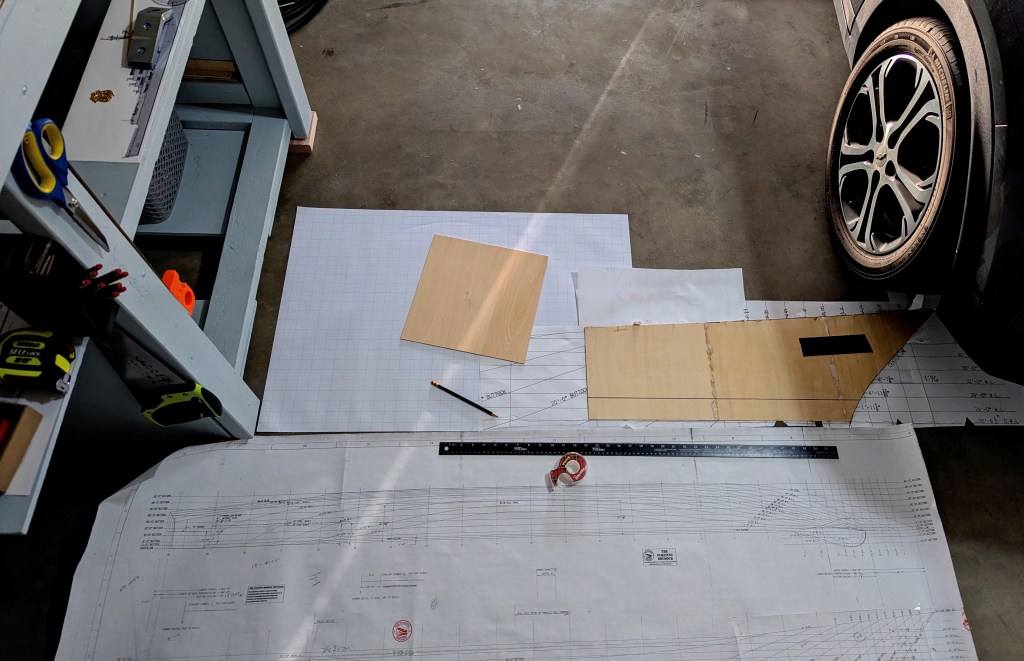
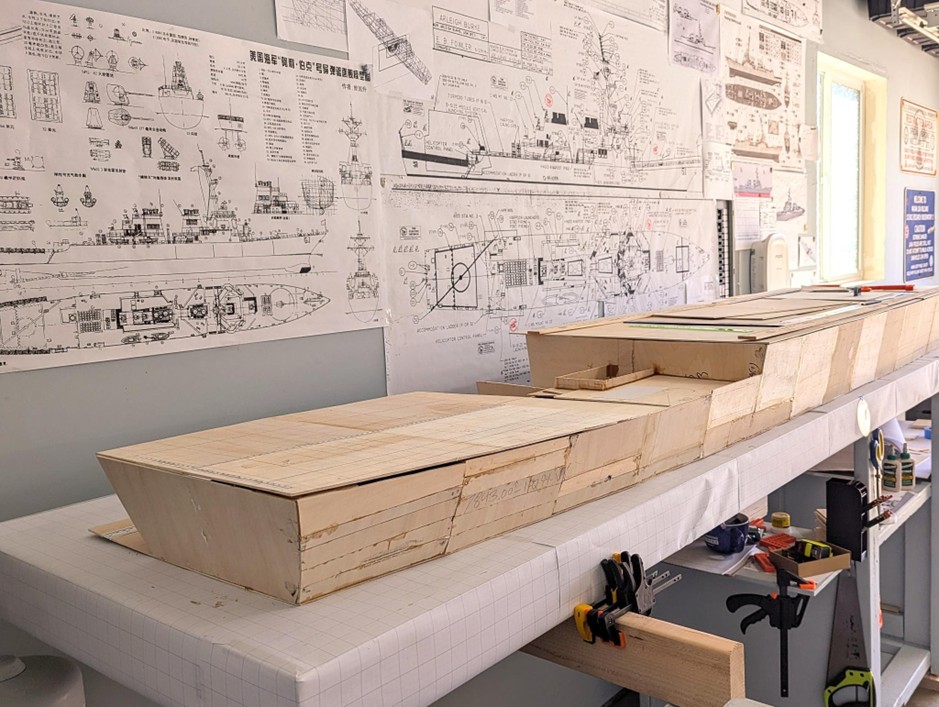
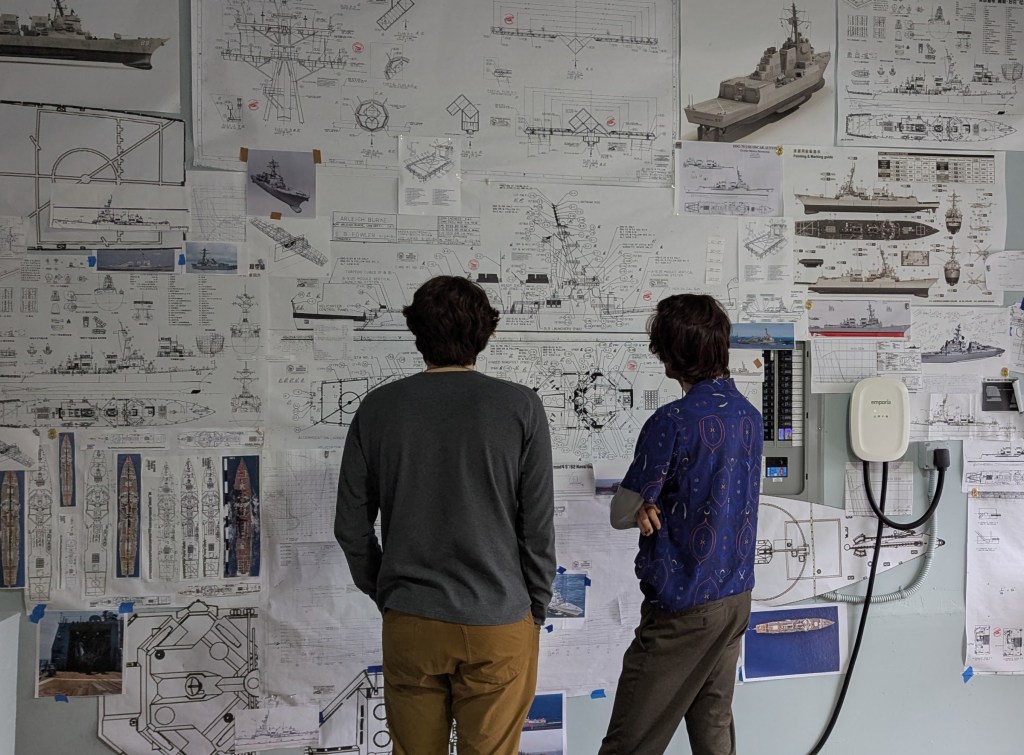
I only had to use the garage floor as a mold loft a couple of times. Shout out to the floating drydock.com for the invaluable ship's general arrangements here.
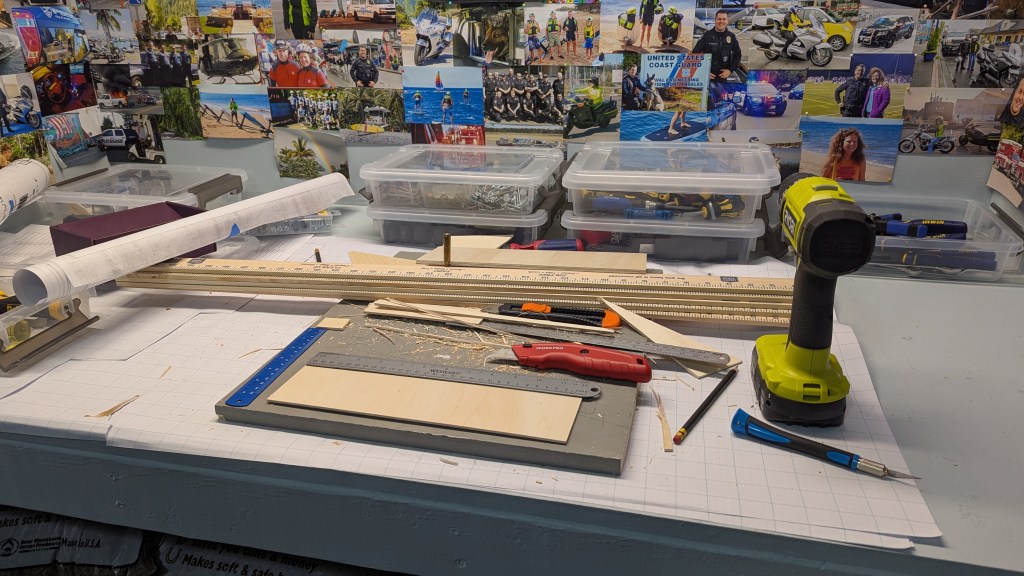
My cutting boards were whatever scraps of thick wood I could find laying around. This red box cutter reminds me of my feral youth when I had very accidentally sunk one of these things into a leg (mine) while cutting boxes for a halloween robot costume. Still my best scar.
There was a bit of mathing and cross referencing and reconciling involved in all of this. Dimensions, fractions, angles, scale conversions and measurements in both imperial and American non-metric Arabic units. My highest math had been algebra but I failed it three years in a row in high school. Finally in my senior year (class of '86) they let me finish with an easier business math course, taught by Mr. Arntz who had no tolerance for kids using chewing tobacco. One day he noticed a student sitting next to me who had some chewing tobacco in his mouth. He yelled at the kid to swallow it. The kid did. And then he turned green. I saw it. It was epic. Then he ran outside to puke. Almost ran into a very pregnant sophomore. High school was different back then.
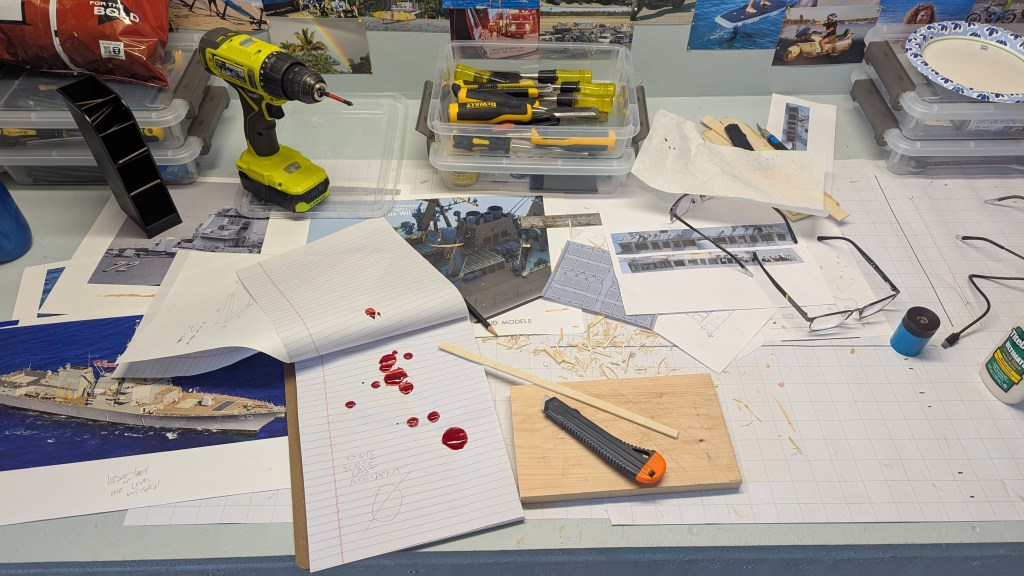
Here we see the beginnings of a fantail and flight deck. I was fortunate to have close access to a nearby print store for making large scaled up enlargements of drawings. I figure I went through a half dozen notepads and a dozen Mirado Black Warrior pencils. And a few band aids, because remember, the balsawood/basswood plywood sheets, to cut into pieces, does require a bit of pressure with sharp blades and uh...yeah I did experience the occasional misjudgment of time, space, angle, pressure, force, and velocity, combined with the variables of coefficient of friction and material resistance and density - different layers of wood grain.. factor in blade sharpness.. yeah, there were some slips. Slips happen. Blood was shed. nbd. Actually my best scar is a shrapnel injury from an explosion onboard CG-20 in the Persian Gulf, back when Reagan was the Commander in Chief and the US Navy's fleet total was just shy of 600 and we hadn't gone to war yet against Iraq or Iran.
The ratio of hours worked / injuries sustained from slipped knives worked out to roughly weekly incidents that required resetting the days since last injury counter back to zero.
Shoutout to the shipyard CFO for setting up a first aid station next to my workbench after seeing the frequency of the slips slices nicks stabbings and lacerations to the lead shipwright's appendages. If there were two or less in a month, that was a good month.
Both sharp and dull blades cut with equal regularity and varying severity.  Under my thumb there is a scar from a bow saw (age 12) competing with a scar from an electric chainsaw (age 17).
If you want to make one of these yourself, I can save you tons of time because this whole thing was a learning experience and I learned a lot. If I were to sustain a major head injury and choose to do something like this again, I could do it in half the time now that I know what I'm doing. I should clarify that the service-related scar on my right side was actually from an exploding canister of pressurized gas that had been tucked into a standard 25-man life raft Mk-6 canister. One day while on routine air picket patrol in the blazing heat and haze somewhere off the coast of Bahrain the defective tank got hotter, built up pressure and expanded enough to rupture the whole thing, with a resultant very loud unscheduled rapid disassembly and I happened to be just a few feet away when it blew apart into several jagged pieces, popping off the top of the life raft cover and heaving the bright orange raft out into the sea snake infested warm water. The life raft was recovered, a bit shredded. From the explosion, not the snakes. I got patched up in sick bay and then it was back to several more weeks of groundhog day, navy style.
You know it's not really a project until there's been some blood sweat and tears.
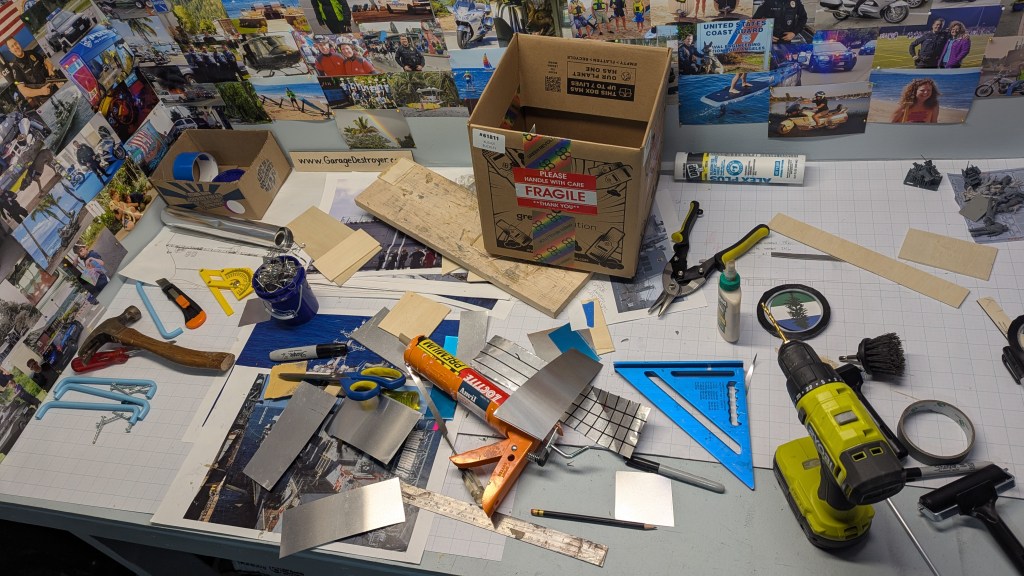
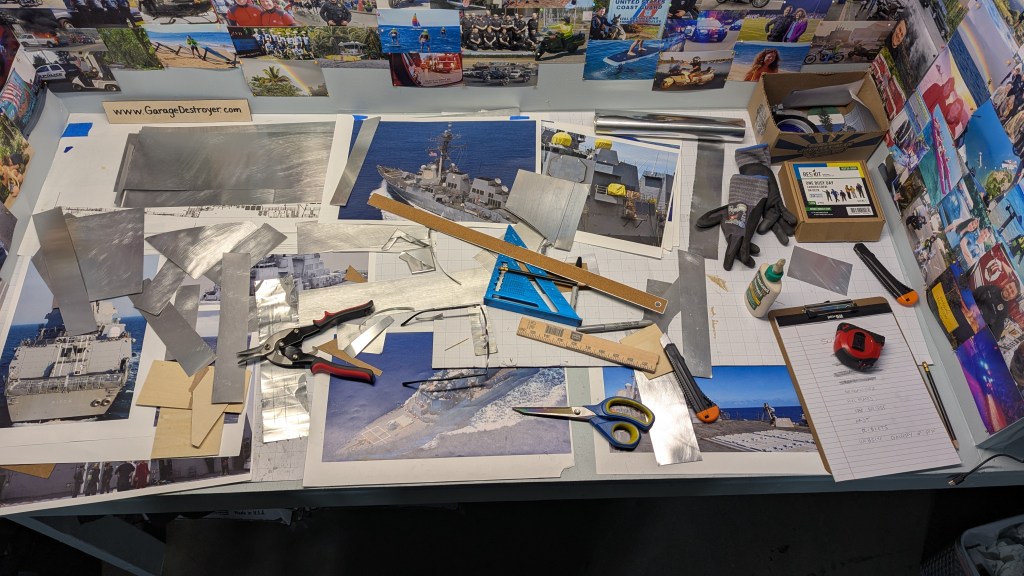
Graph paper is one of the ten essentials for a project like this. And clamps. And rulers. And rolls of tape. All kinds. And markers. And band aids.
Only one injury was serious enough to require a trip to the local urgent care to re attach my left arm from the fingertip down. This was an $800 dollar bill because, you know...America.
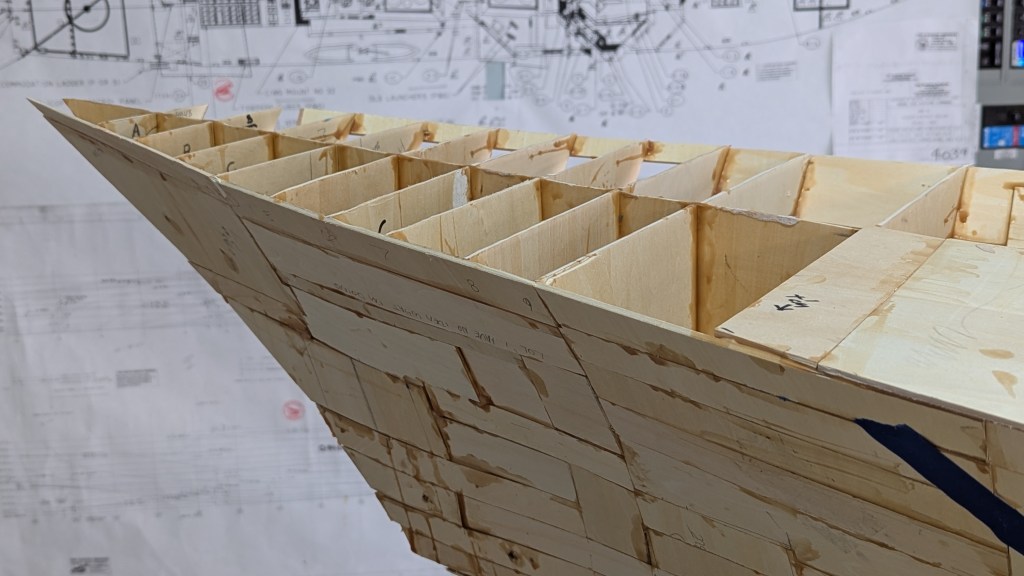
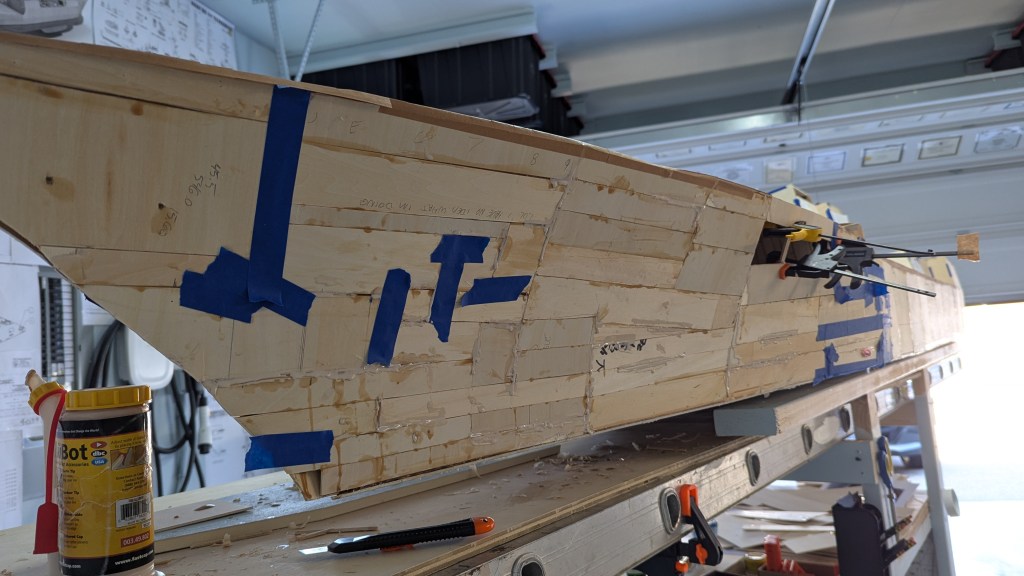
 As you can see, this is the first time I've ever attempted anything like this. Conforming to hull lines using basswood plywood it tricky - it's not typically recommended for planking because it has of course very limited bending abilities.
There were methods to this madness of mine here, the main one being to "plank" on the biggest pieces wherever I could, within the pliability threshold, and then fill in with smaller pieces.
This wood hull doesn't have to look pretty because two (!) layers of metal (!!) are going to cover it. I know half of you are cringing hard at this photo. I get it, it hurts me too. I'm showing this specifically to inspire you. Whoever you are. Some of you are wondering if you could tackle a project like this... I say yes, sure you can. No prior experience is necessary. Just do it.
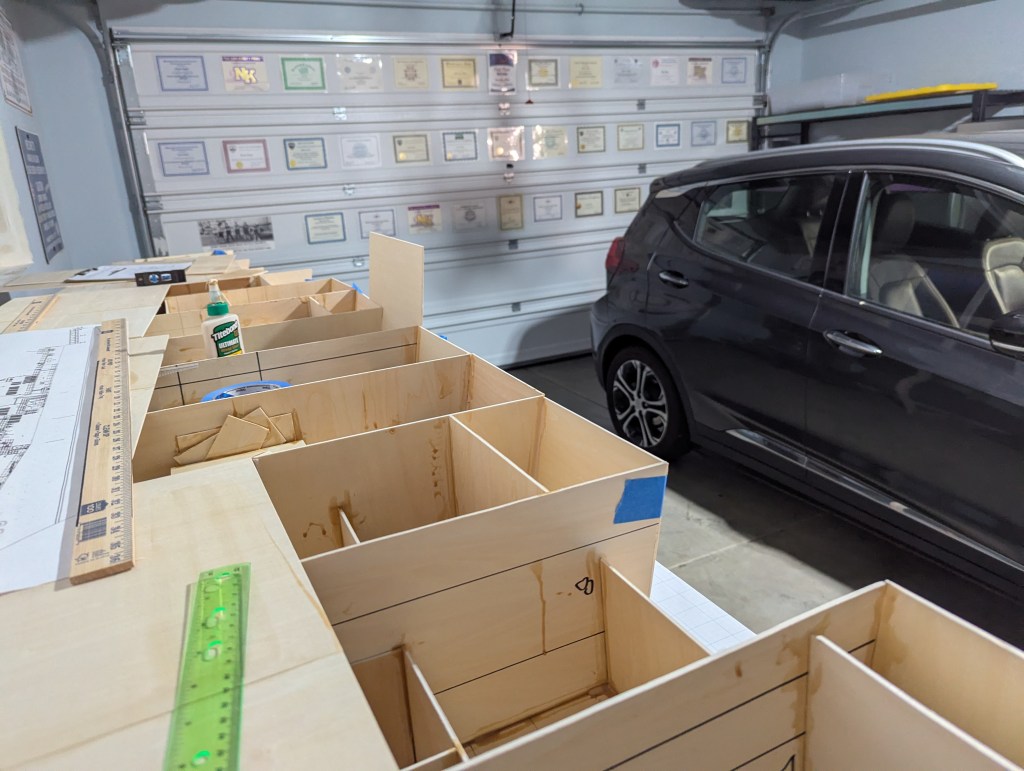
Stem to stern longitudinal intercostals lacking general arrangement scantlings. If you know what that means you are probably also deeply amused by this photo.
Two months into this project and the neighbors started to notice what was going on my garage.
Some sections were easier than others to assemble.
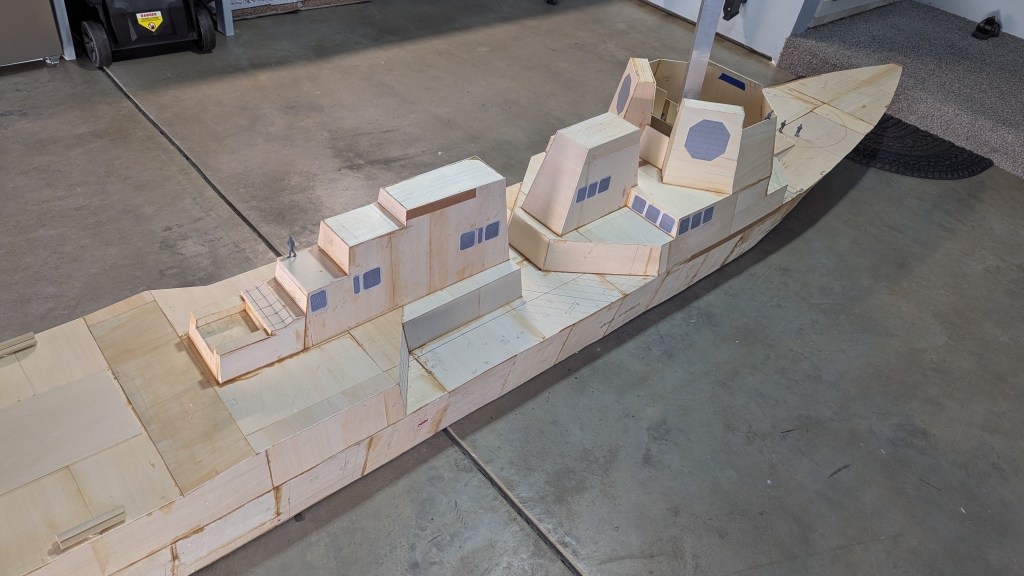
Spun sideways here for a photo shoot. The lower hull took about a month to build, the hangers and aft deckhouse took another month, and the forward superstructure much, much longer because reasons. Mostly related to geometry, which is like math. Reminds me of the time I flunked out of a navy training school called Basic Electricity and Electronics. It was a lot like math.
Why? Why is this guy doing this? Well.. I'm afflicted with a relentlessly creative drive. This project replaced my previous hobby, the one where I was a content creator on youtube, making long form scenery and travel videos complete with custom soundtracks. Right around the same time I reached a quarter million views and a thousand subscribers, I realized that the rising maelstrom slopflood of AI generated video and audio -both the good and bad kinds- would be too much for me. Seeing the general enshitification of the internet going from bad to worse, I decided to pivot away from the digital world and go toward the physical IRL meatspace and make something with, as they say, my own two hands.
It's surprisingly lightweight and sturdy. I will admit that more than two times I had to forcefully hammer and cut out a large section somewhere due to misalignment and miscalculated measuring issues that most of you would have never noticed but it is always on my mind that there are literally a quarter million current and former sailors and shipbuilders out there who might notice. And I expect a few will give the finished result a critical eye, so accuracy is important for me. The shipyard's lead architect and the shipyard build supervisor had anticipated some setbacks like this so it was not too painful and they eventually decided to both take the blame and move forward. For your viewing pleasure I thought about including the awkward photos of those, uh, learning experiences but tbf they looked too much like either the USS Cole, the USS Fitzgerald or USS John S. McCain on their worst days and nobody wants to see that.
I listened to chill music and podcasts while doing this and (tried to) ignore the news; this is one of my happy places.
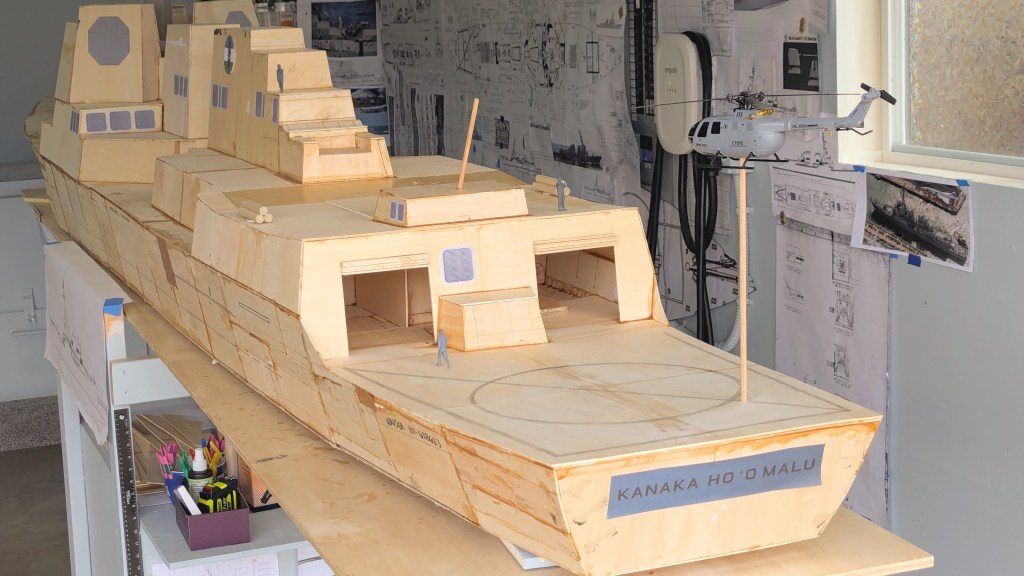
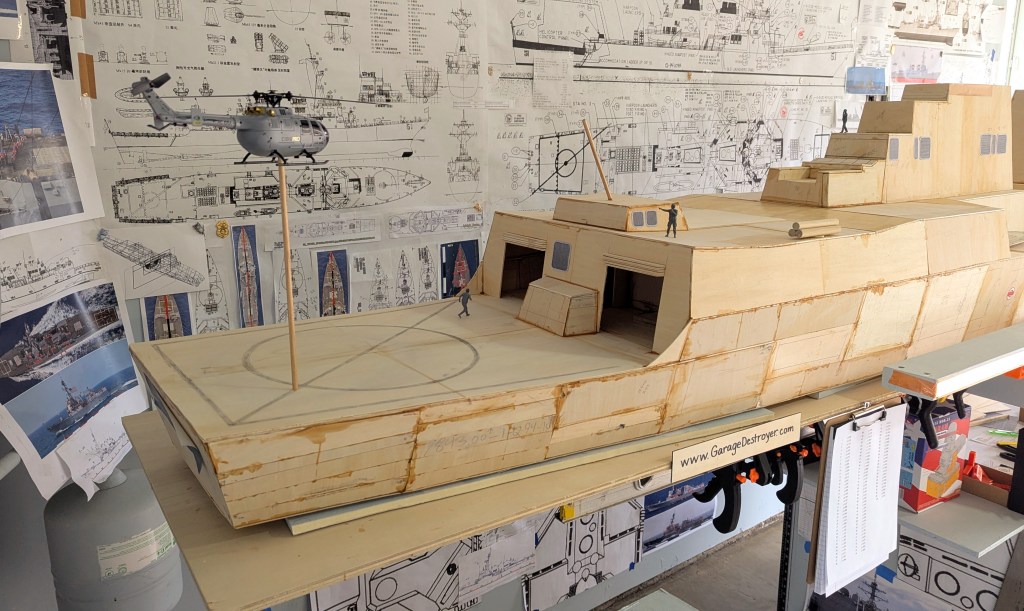
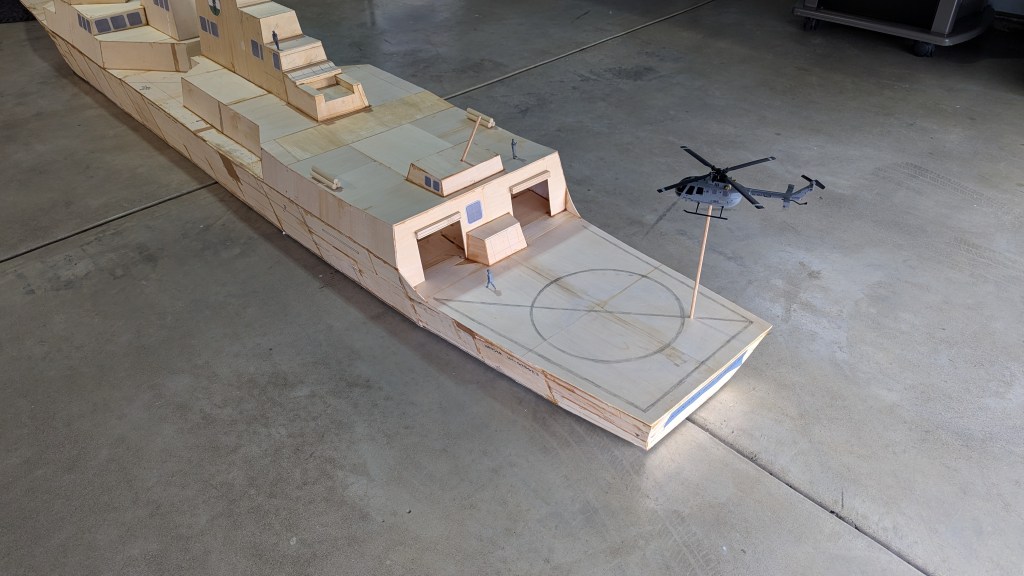
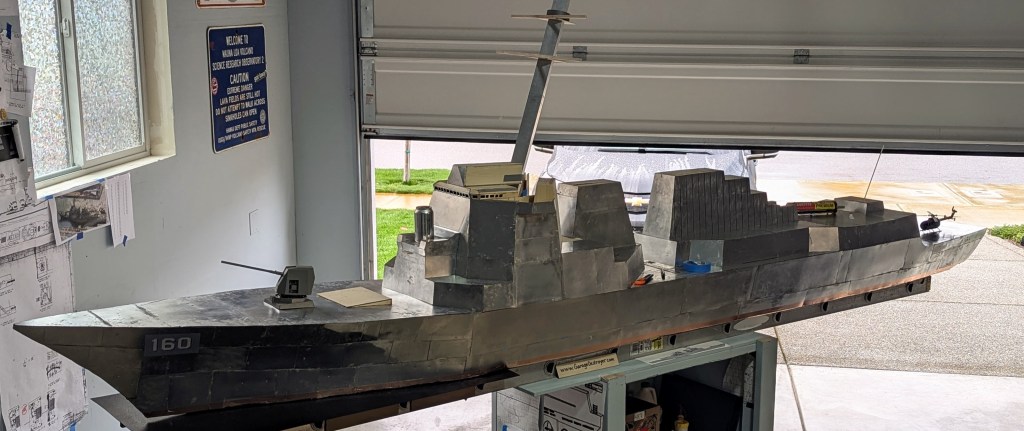
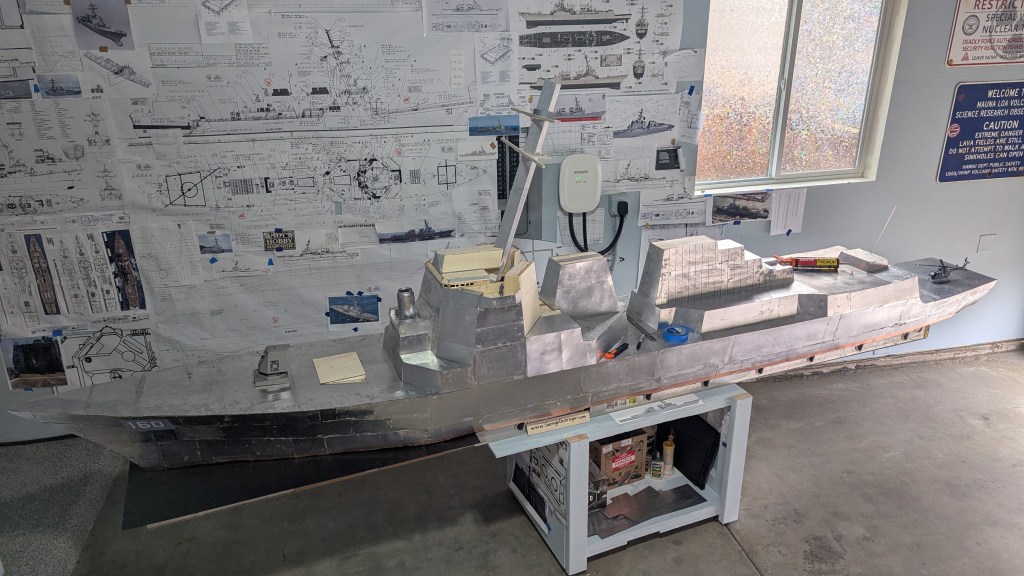
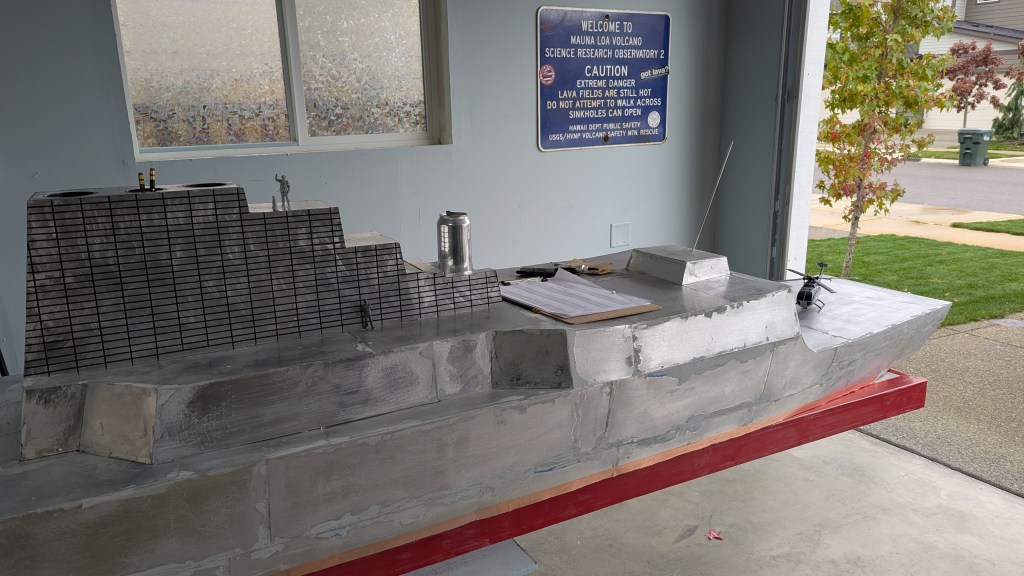
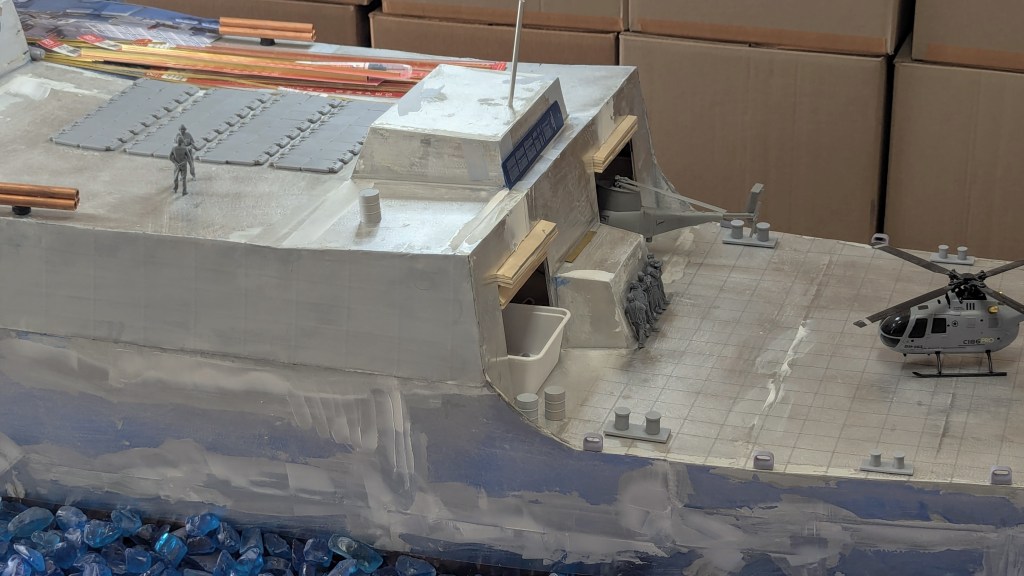
Yes, you are correct this is the wrong kind of helicopter; it's a German MBB Bo 105 LUH - a toy model that I had laying around. Unfortunately it's 1:38 scale, which makes it 8% undersized for this project. So...auto DQ. It's serving well though as a temporary placeholder. See the dude standing above the hangar door, pointing at it? I got to do that a lot when I was in the navy. Ok I wasn't like pointing at the pilots, I was the guy who stood there with a metal paddle that was green on one side and red on the other. I was the visual backup for the pilots, in case there were comms problems. So I just stood there during every flight op, very close to the action. Easiest job on the flight deck crew; I didn't have to catch any mail bags thrown out by the crew chief. And no math involved. God it was cool af. The rotorwash and hot jet fuel exhaust and the sound and force of the clattering thumping blades hovering at eye level was absolutely terrific. There were Bell UH-1 Iroquois, Boeing CH-46 Sea Knights and Kaman SH-2 Sea Sprites and Royal Navy Westland Lynx, old Sikorsky Sh-3 Sea Kings and new SH-60 Sea Hawks, most navy, some USMC. Nineteen-year old me (I was the youngest of the 400+ crew) got a fabulous front and center view for a few dozen flight ops across the north Atlantic ocean and back and in a number of different seas, bays, gulfs, straits, channels and passages. Those experiences were definitely a highlight of my life. Because helicopters are cool.
This flight deck will eventually get proper 1/35 scale MH-60R Seahawk, of which there are several different kinds of model kits to choose from and a major reason why I went with this scale for my ship.
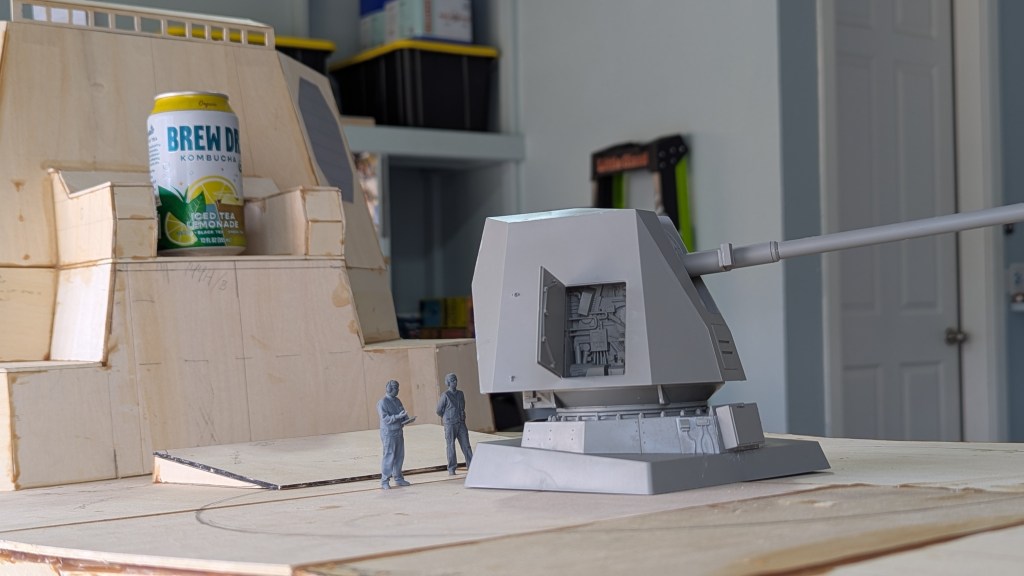
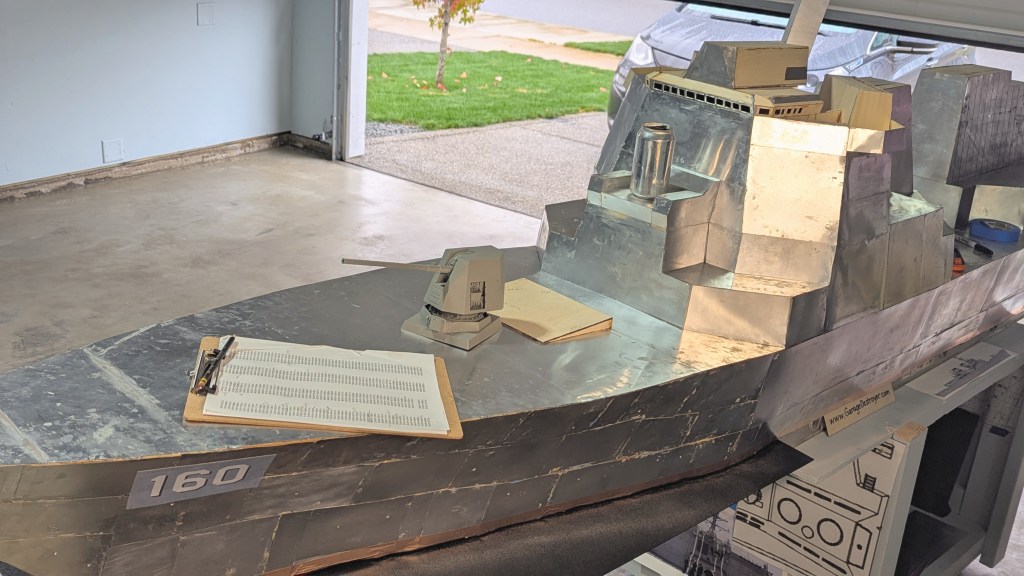
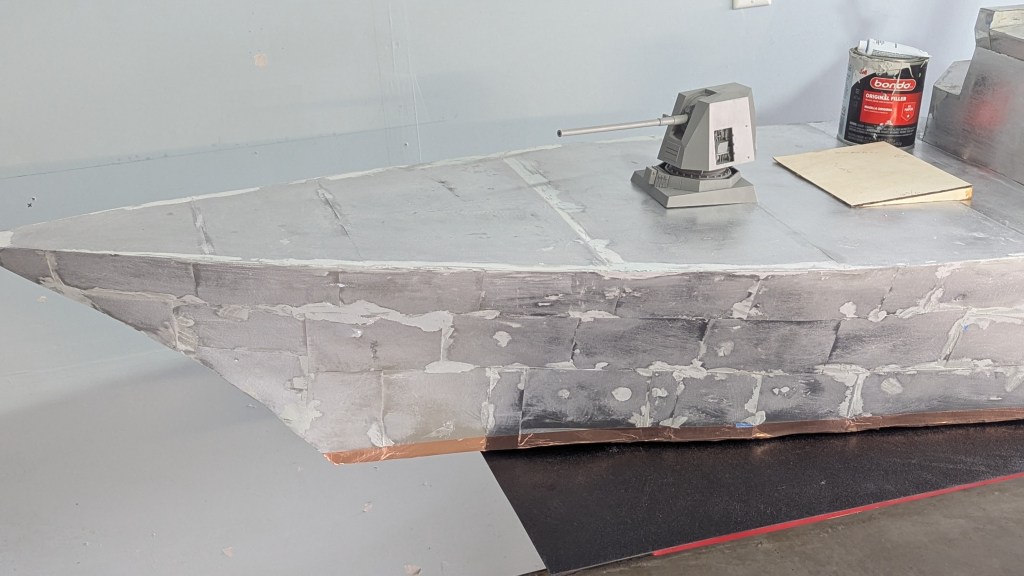
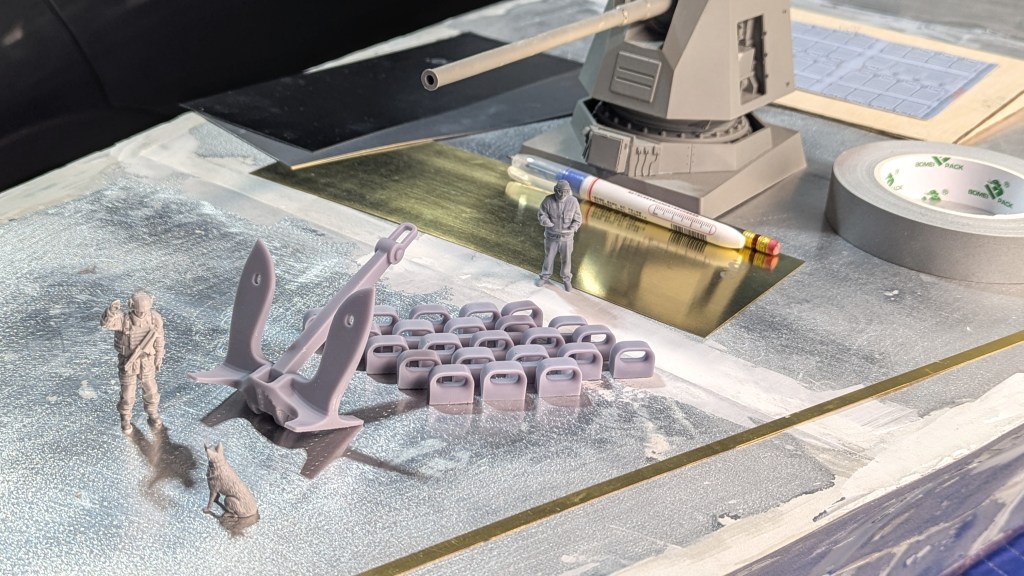
This nice pew pew is a Takom Mk.45 Mod 4 5"/62 Naval Gun kit, in perfect 1/35 scale. How cool is this, right? That gap at the bottom shows (my) intentional transverse deck camber.
This kit was pretty easy to build. And yes of course it will get painted. I'm still amazed this is even a kit. Because I cannot find anywhere on the innertubes anybody else who has put one of these on a diorama this large like this. Which makes me wonder why they made it. And who buys it. And how they display it. I'm almost positive I'm the only one who has put one of these on an actual 1/35 scale warship model.
Aft CIWS station under construction.
PHASE II: IT GETS METAL
Month three. One of my major goals for this model was that I wanted it clad entirely in metal, for a more authentic appearance. I tested a few different gauges and types of aluminum and determined simple rolled roof flashing from the nearest big box hardware store would work perfectly well for this application. I used a few different kinds of special polymer-based hybrid adhesives and refined my techniques as I progressed.
Every metal plating sheet was carefully hand cut to fit, then sanded, cleaned, and glued on one a time to cover the atrocious wood hull.
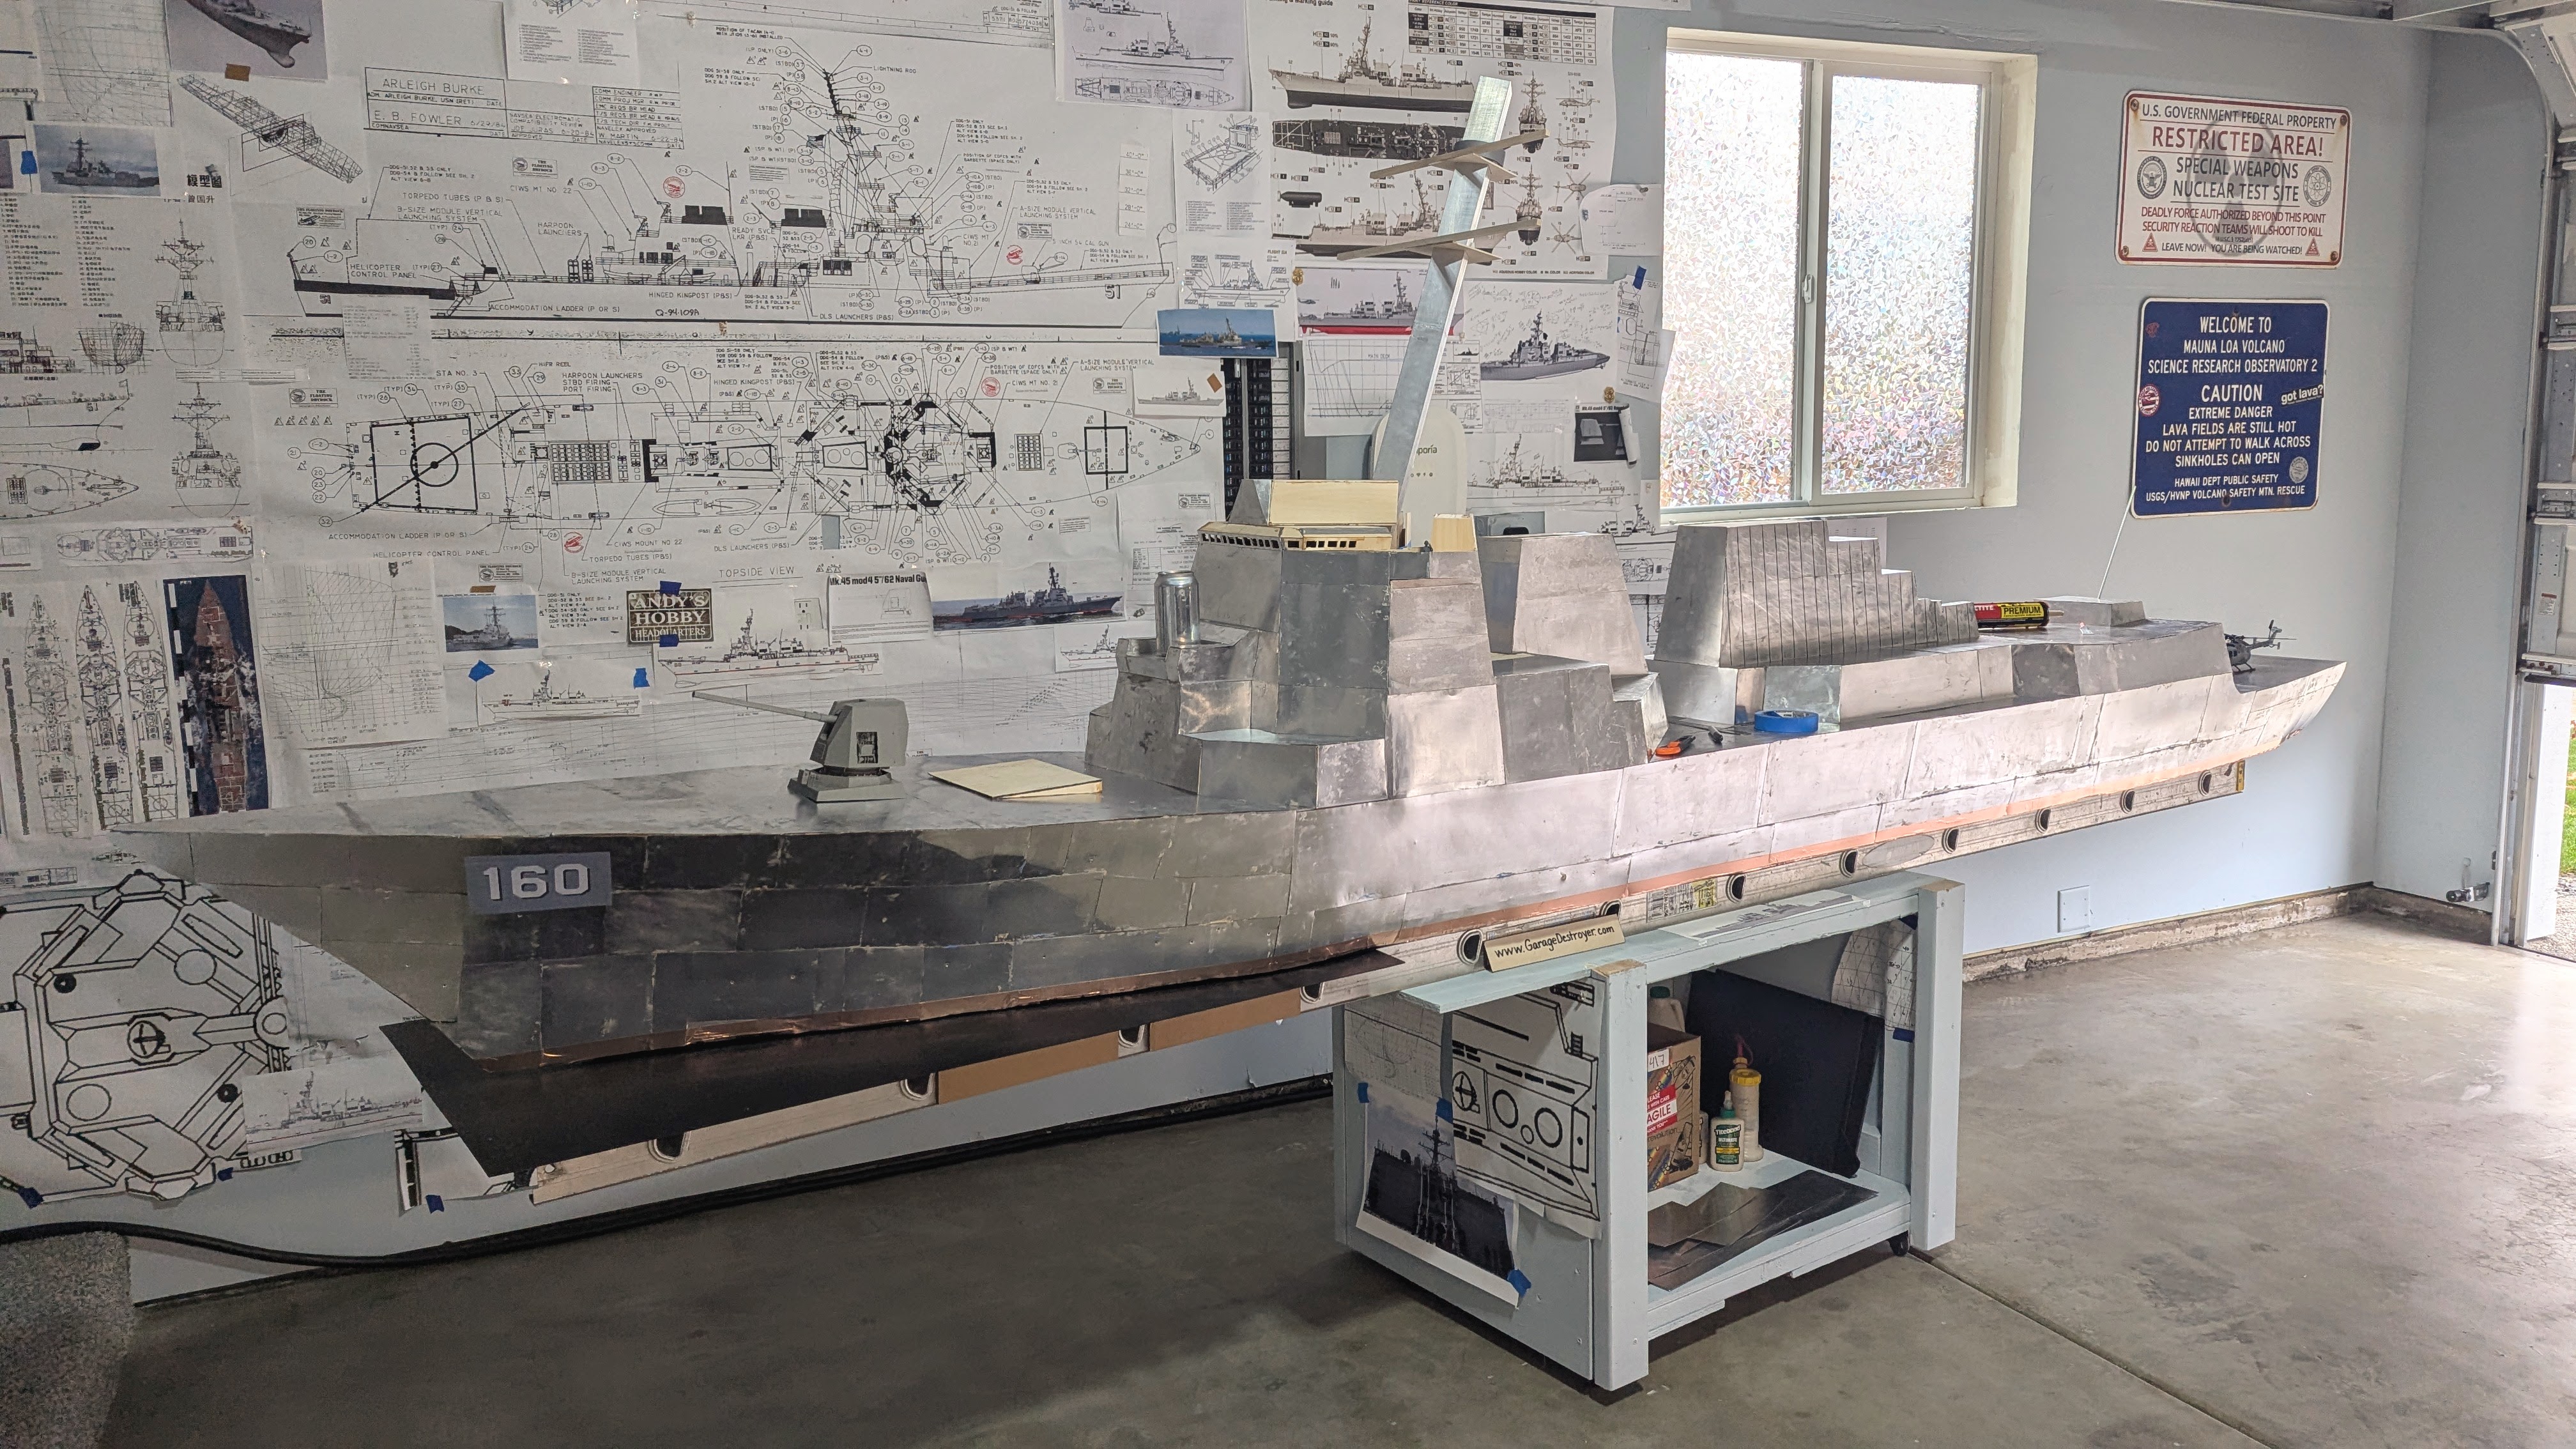
November: It's month four and I still have only a vague idea of what I'm doing but the metal hull plating is definitely a visual improvement. The whole thing is a little heavier now, but it's still much lighter than it looks and can easily be picked up and carried by two people. Now it's attracting the attention of delivery drivers.
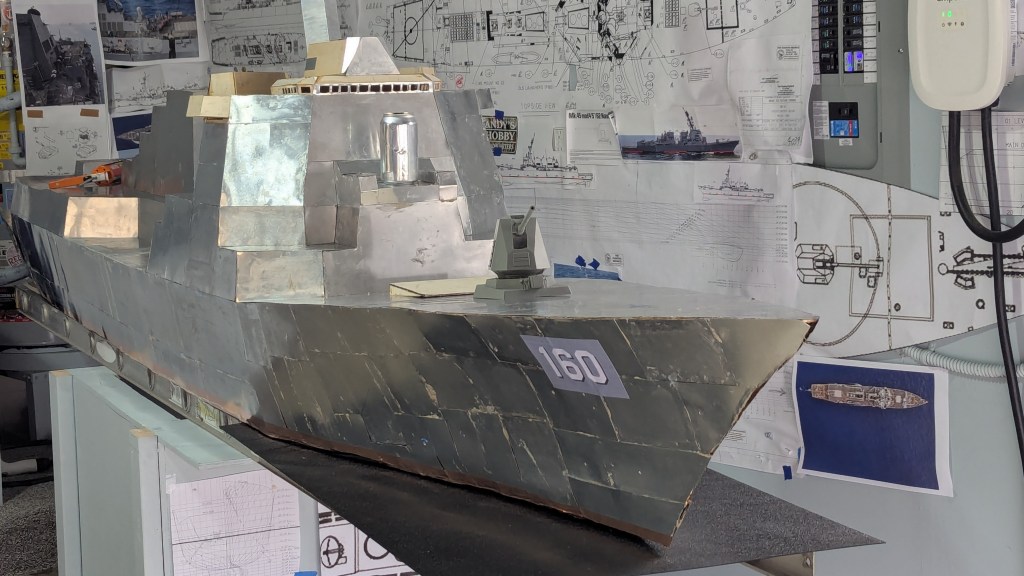
160 is a fictional future hull number, a homage to my career-long personnel number 610. Now if somebody serving on a real DDG sees this and wants to give me a special deck tour to let me study their ship's details in person, I would gladly renumber and configure this model to match. Thank you for your attention to this matter. Presuming that will never happen, the planned working name for this fictional hull will be the USS CASCADIA.
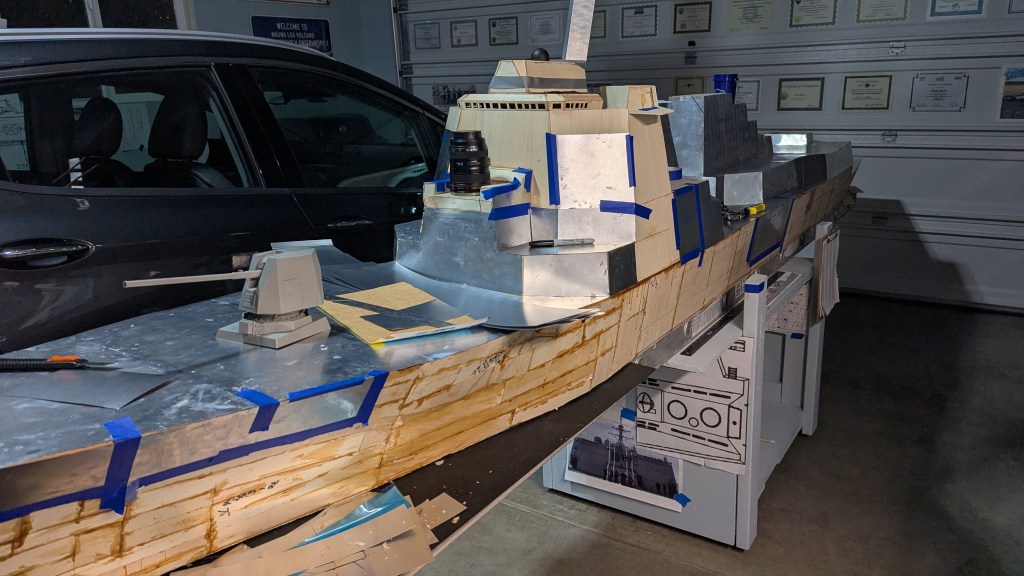
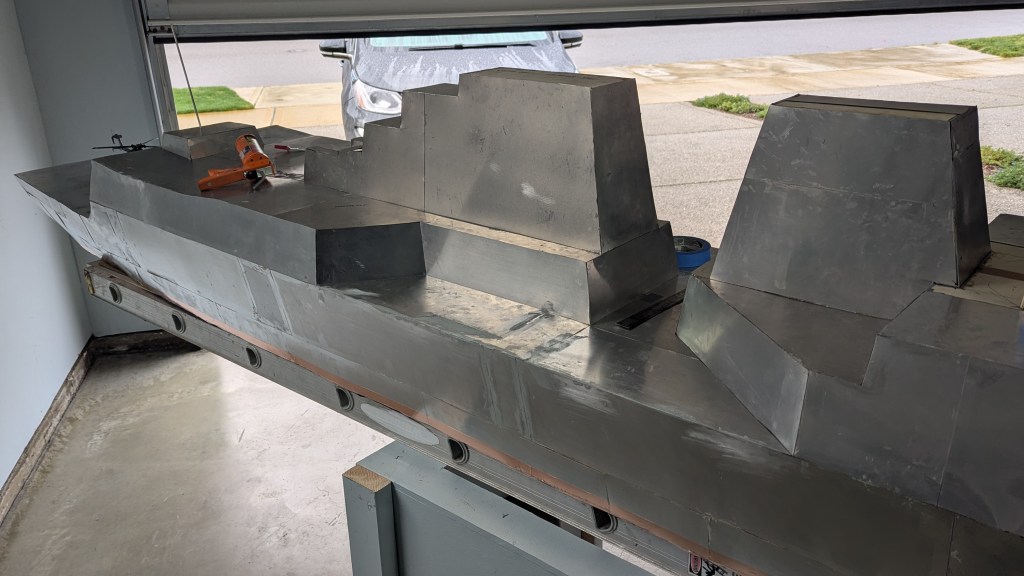
This is all just the under armor aluminum plating - another metal layer is going to cover all of this. And then there will be haze gray paint. And scale non-skid and railings and ladders and bitts and chocks and scuppers and VLS cell doors and QAWTD's and just about everything else. The cordless drill was the only power tool used so far. I'm aiming to be the quietest shipyard on the block.
I'm building this as a generic exhibition model of a Flight IIIA version, NTU mod 6.1.0 which means it will be sporting as God intended both a Phalanx CIWS forward and a SeaRAM CIWS aft; a sadly rare configuration and confirmed to me as ideal by a former DDG SWO commander who saw my model in an online forum and was suitably impressed. I was further encouraged by an experienced shipyard worker who saw this and told me it was looking pretty spot-on so far. SEWIP? No!
Surprising everybody especially myself, I managed to cut every piece of metal by hand with snips and scissors without any more blood loss.
I did however carelessly brush up against some of the ship's sharp new corners and edges and got some impressive scrapes. So there's that.
Full Metal Jacket FY
After agonizing about the hangars, I decided to skip all the detail inside and plan for closed doors. You're disappointed, I know. In my defense, I'll point out that since there will be a scale model of a helicopter hovering over the deck, authentic naval flight operations do require that the hangar doors are to be secured.
And I know this will disappoint some more of you but this model is not designed for radio control operation(s). Because as you can see, there's..uh..no lower hull. Mostly because I have space constraints. Also a complete and properly (re)engineered hull this large with an actual metal-plated superstructure would require a not insignificant amount of ballast. In addition to running gear and batteries, all of which would need to be perfectly balanced. And then the whole thing would weigh in at well over 200 kg GVW. And it would then require a hoist. And a taller garage door. And a specialized boat trailer. And something to tow it. And then at that point I'd of course have to rig the cannon to fire actual projectiles. One would really need a private lake for that kind of fun. Anyway, as it is now, I think this is currently weighing in somewhere around 35 kg which for a display model is quite manageable.
This hand crafted XL scale guided missile destroyer model is apparently a one of a kind and kind of surprisingly probably the world's first; in all my research I have yet to see any other Burke class model destroyer anywhere near this stupid big or made with this construction method. At this stage it is definitely attracting the attention of people walking by outside in my suburban neighborhood, more than a few stop and stare and I always invite them in so they can ogle it closely. It happened enough that I printed out a QR code for people to scan so they can see my photo blog here and keep up with the continuing progress.
One question I get a lot is what I'm going to do with this thing when it's completed. And the answer is.. I don't know yet. I see two options: either a deserving naval museum gets it, or I'll sell it to a private buyer.
My goal is a museum quality model, which means this will be outfitted with a lot of accurately detailed 3d resin printed parts and pieces including the fairlead and anchor and antennas and rigging and RHIBS and radars and radomes RAST tracks and UNREP transfer station identifiers, flight deck markings, flight deck nets, QAWDs, DVSS, deck tie downs, etc. et al. I was pleased to learn that "museum quality" is a subjective standard, and at the rate I'm going this model will definitely achieve that level.
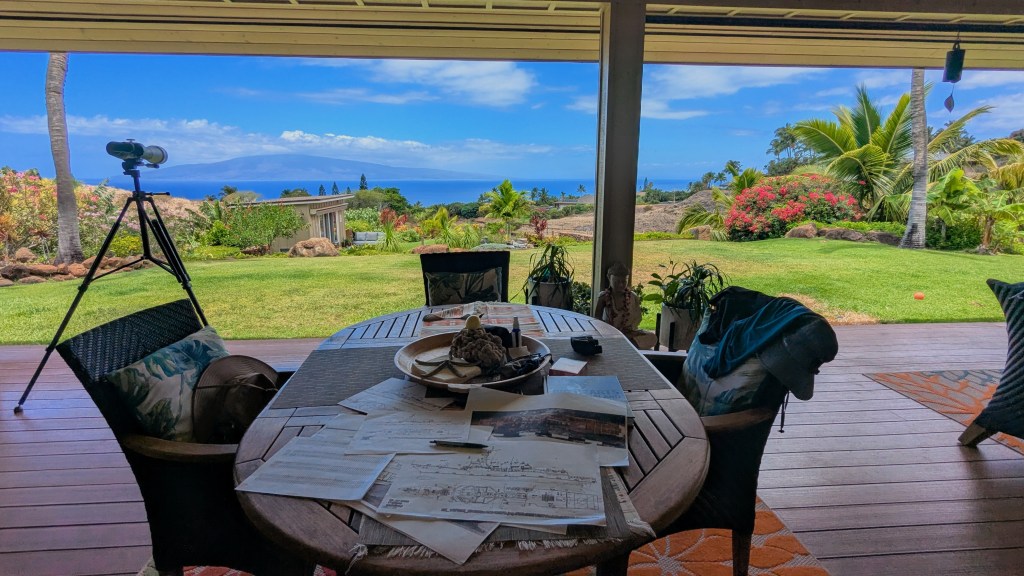
Any and every good boat project has to get ignored occasionally. But I admit I did bring along on a two week Hawaiian vacation bunch of drawings to pore over and study and reconcile the visible differences between different shipyard builders and class variants.
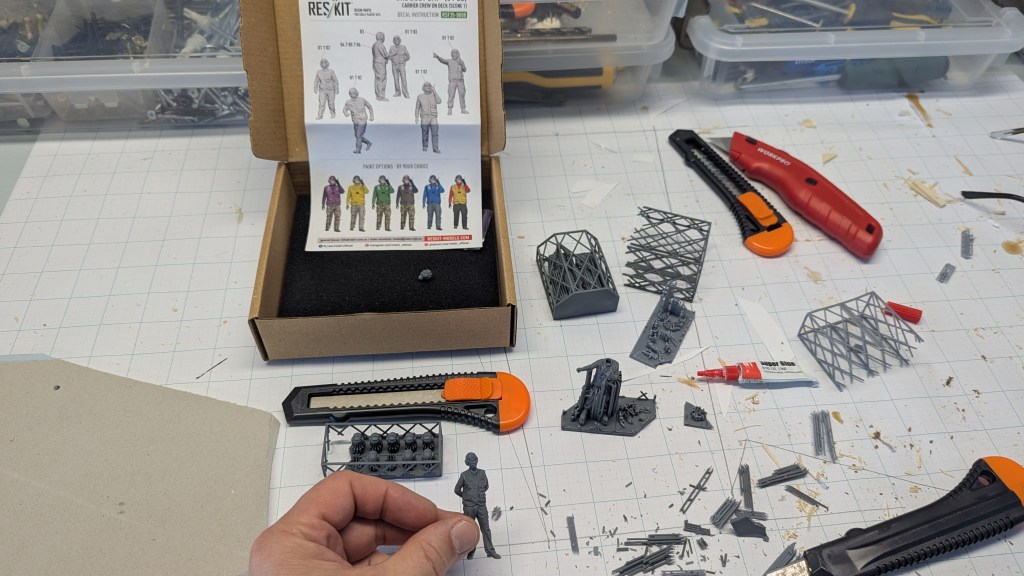
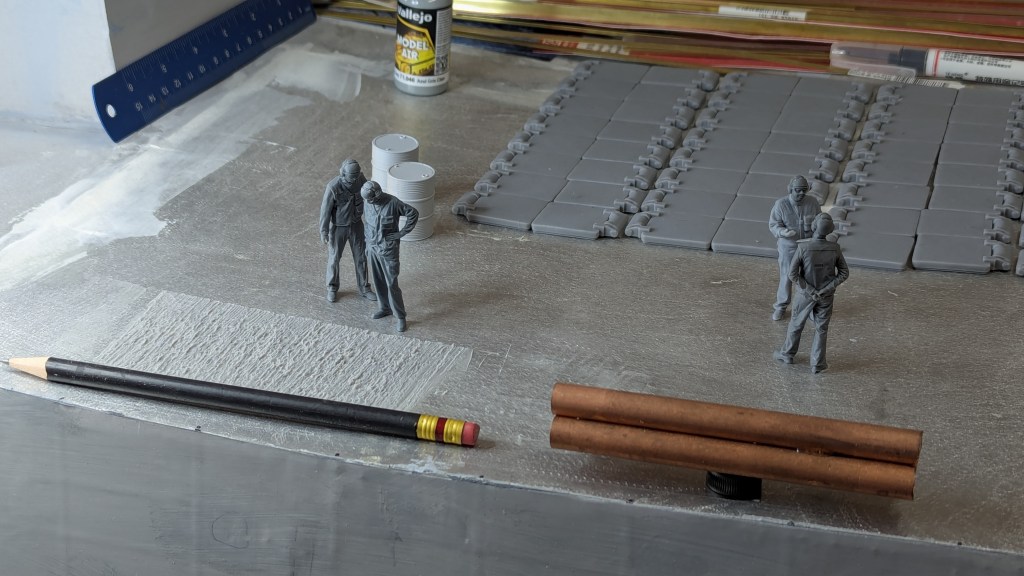
Score! High quality 1/35 scale period-correct USN flight deck crew figures! This one guy is too chill though. Clearly a supervisor. That's okay, they'll all be replaced with better figures in a year or two. Hey speaking of, this model needs some shipyard worker figurines. If you have the capability to do this..my email is: nhx610@gmail.com
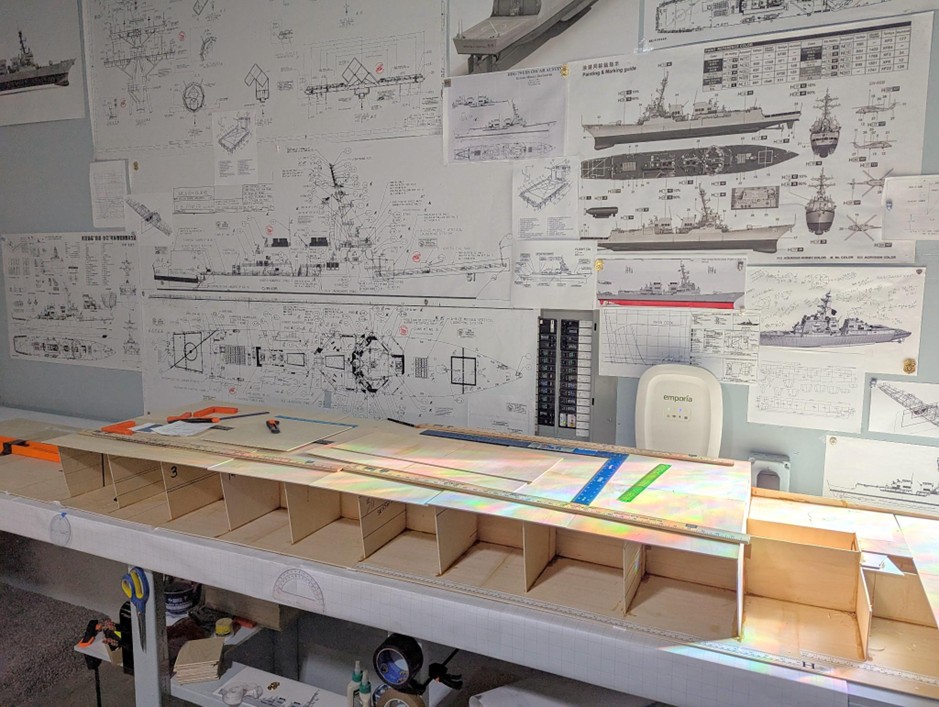
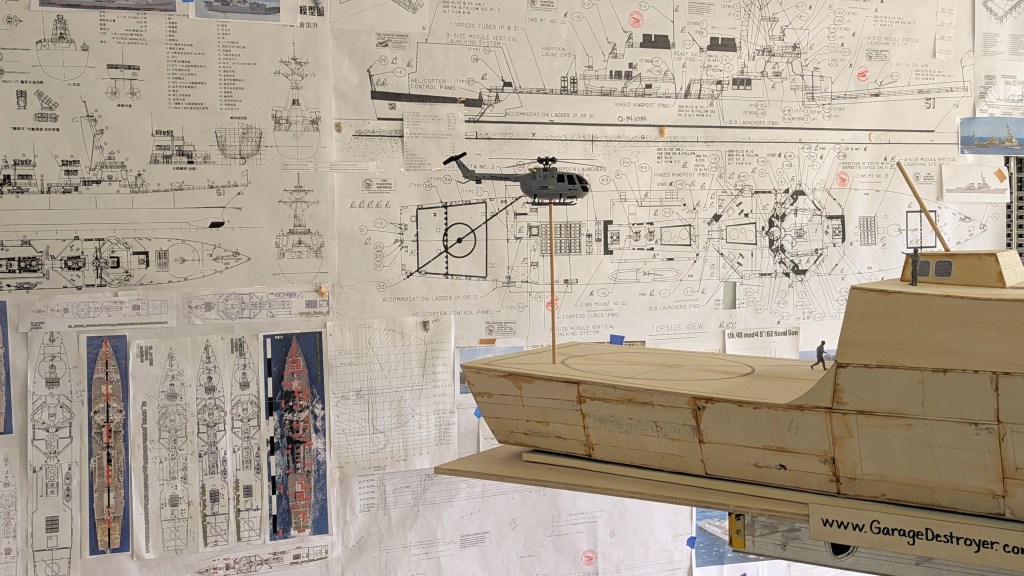
To answer another common question, the big prints of ships plans came from the floating drydock.com and the rest from various internet open sources. Of course the Navy does not share any of their official general arrangement deck plans or any other helpful technical details; I had to do my own research. And now that I've spent who knows how many hours studying literally thousands of saved reference photos from hundreds of internet sites, I can notice pretty quickly when the accuracy of much smaller scale plastic models of this ship class are not..quite..right. Same for quite a few of the computer 3d rendered models of these destroyers found online - virtually all of them have small or large deficiencies and inaccuracies in dimensions or angles or features, when closely inspected.
The navigation bridge windows here are placeholders and will upgraded. The clipboard has a scale conversion chart which I used constantly.
There are enough different build phases overlapping now that it gives me a fine variety of mini-projects to rotate among and work on.
  If you have questions or if you can offer me a special deck tour of any DDG anywhere in the country..here's my email: nhx610@gmail.com
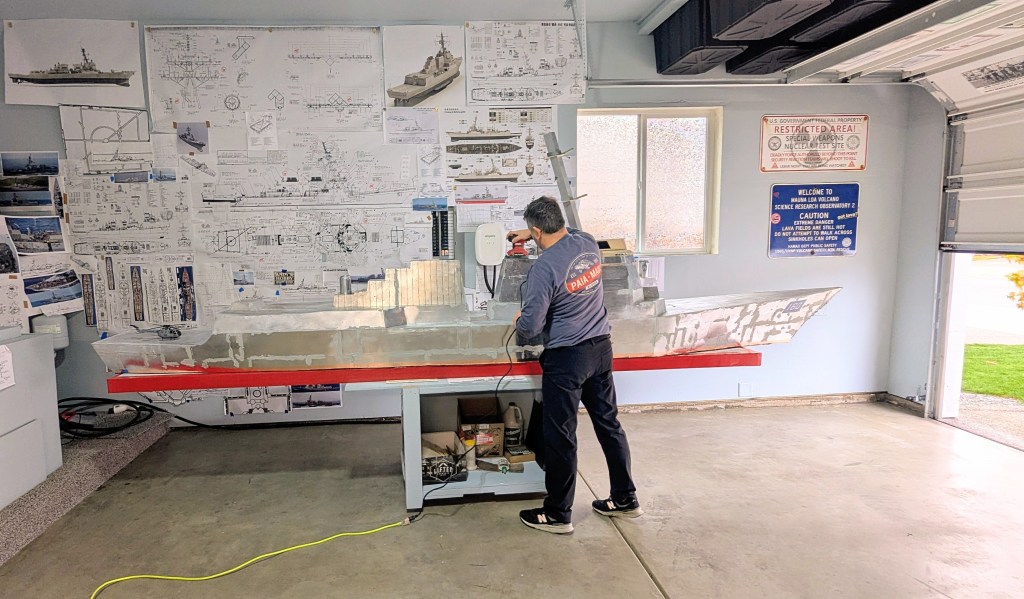
December 2025: Month six. Time for the second power tool, in this case a cheap sander to smooth out some Bondo I strategically smeared into and onto the joints. I did not realize how hard dried Bondo becomes. Also it has an aggravatingly unforgiving cure time, especially when mixed in very small batches. Everything will eventually be detailed and painted very authentically - I have a lot of prior professional experience with haze gray paint. And then it will all be appropriately weathered with simulated salt spray and weathering and aging and rust. Nothing is going to be glossy on this model when it's finished; it's going to look like it's been on a few deployments.
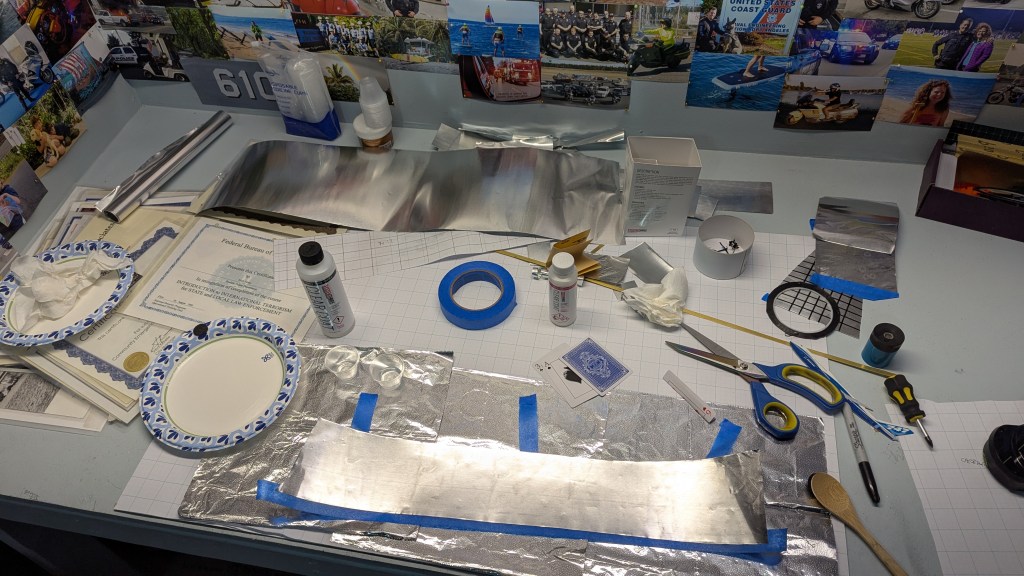
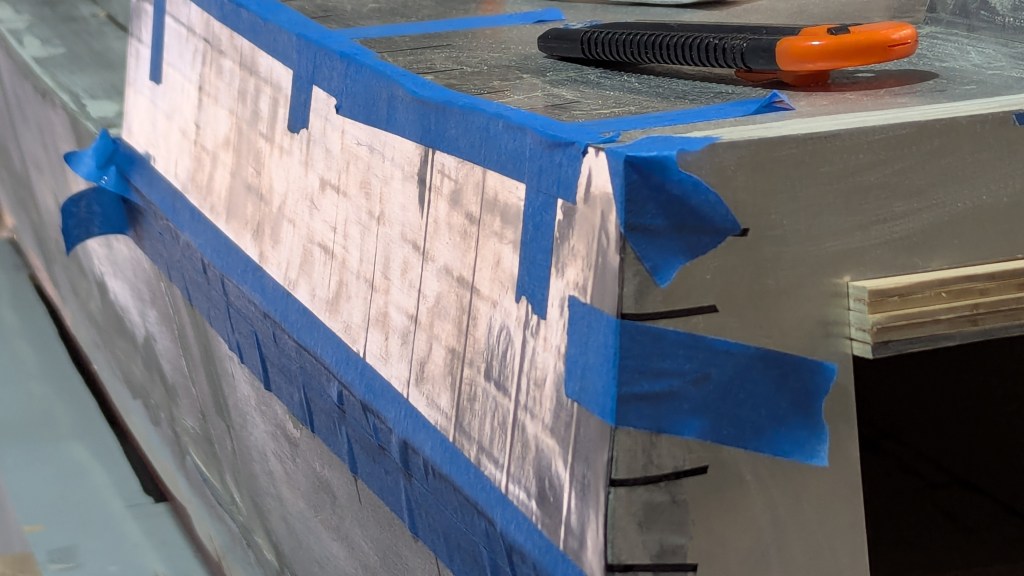
I'm replicating the framing with 2mm wide pinstripe vinyl tape, which will be then covered with 36 gauge aluminum foil - thin enough to burnish and show authentic oil canning between the frames. Or so I hope. It was the best idea that I could come up with. The entire hull is going to get this treatment because a perfectly smooth hull at this scale would be just..wrong. And so accordingly, there will also be simulated scale weld bead lines. Progress has slowed considerably because it's winter and now my garage is effing cold. And I have one of those new hybrid water heaters in the corner that makes hot water by spewing out cold air which is great in the summer but not so much in the winter. That's okay, I'm warm indoors gluing together stupidly small photo etched parts onto a scale plastic kit model of a sweeeet Mk 15 mod. 31 SeaRAM for the aft CIWS mount.
Month Seven. It's foil time. I'm now starting to glue metal onto metal. Prep includes careful light sanding and cleaning with rubbing alcohol on the exterior of the inner plating and of course the matching inner side of the new and final cladding. For this application, I'm using a special high viscosity two-part epoxy, applied paper thin to both the hull sections and the foil. I carefully apply the new metal skin, and spend a long time pressing it and burnishing, with some sweet talking to it and occasional swearing. After a couple days I carefully peel off the tape and tuck in any loose metal edges and corners with some surgically placed cyanoacrylate.
Holy shit I think this might just work. I'm still just making this all up as I go along, powering through all kinds of interesting complications and challenges because this is uncharted waters I'm floundering around in. But nothing good ever happens inside one's comfort zone, right?
There will be a couple of sexy scale 1:35 RHIB's here. This one section here will get probably 20 hours of fine detail work before the boats and davits are installed.
Yay for technology in 2026: 3d resin printing! This shipment from distefan 3d print includes one main centerline stockless anchor, and deck mooring chocks.
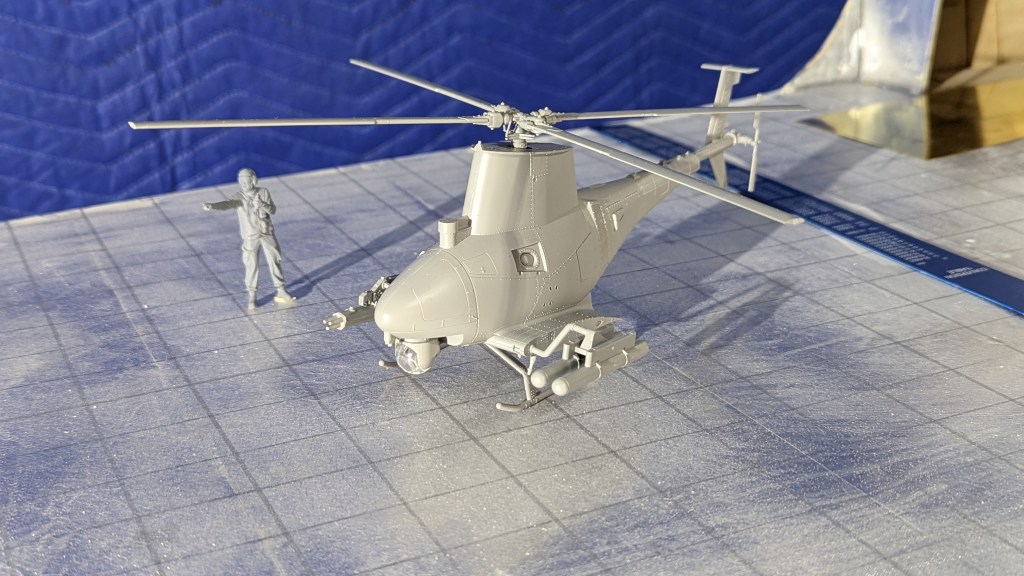
A 1:35 scale injected-molded kit of an unmanned autonomous helicopter? Yes please! This sexy little beast is an MQ-8B Fire Scout. March 2026 update: Well heck my goal of getting a personal deck tour of one of these IRL has just about completely evaporated; the US Department of War has tightened up OPSEC at Naval Station Everett; USNORTHCOM Force Protection Condition (FPCON) Bravo is currently in effect. Which is probably why my dozen formal requests via phone, email, and even US Mail, begging for an up-close study of just the exterior of a DDG have been ignored or effectively brushed off by navy officials from multiple different commands. Maybe giving tours of ships is too woke now. So to get the fine surface details correct I'm going to have to rely on whatever photos I can find online. I'm finding that photos of the signal bridge are especially very scarce.
PCS/HOMEPORT RELOCATION ANNOUNCMENT
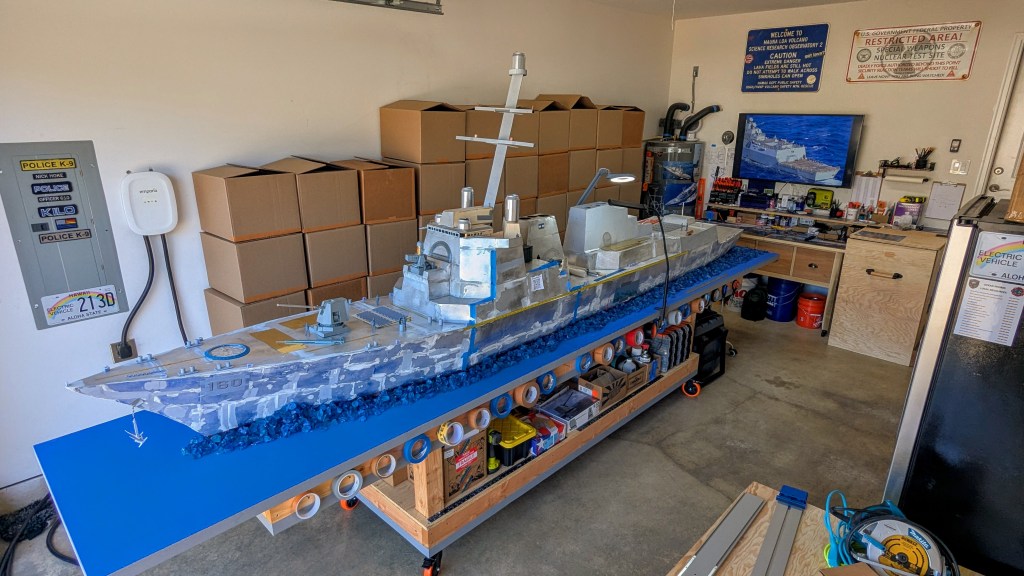
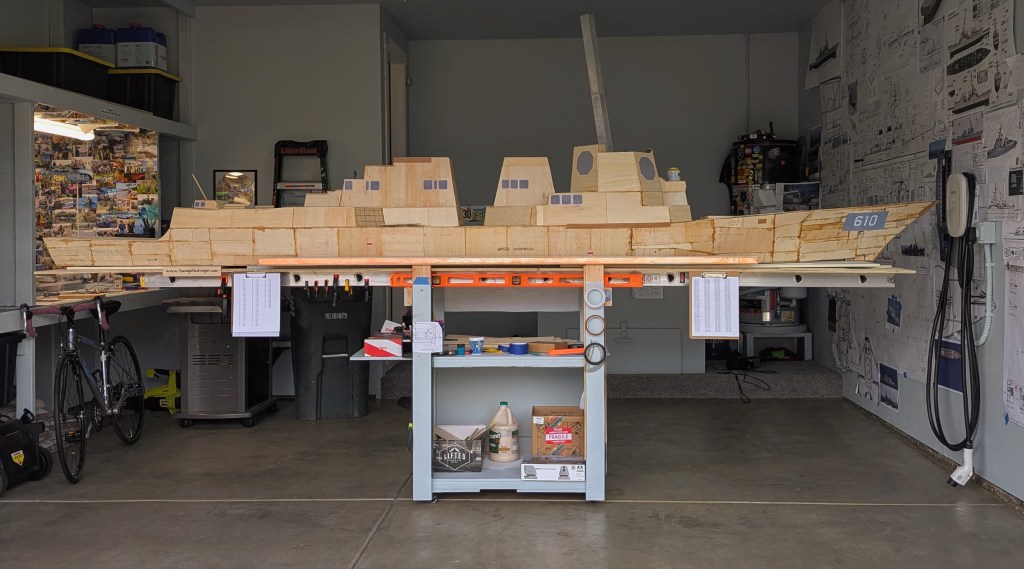
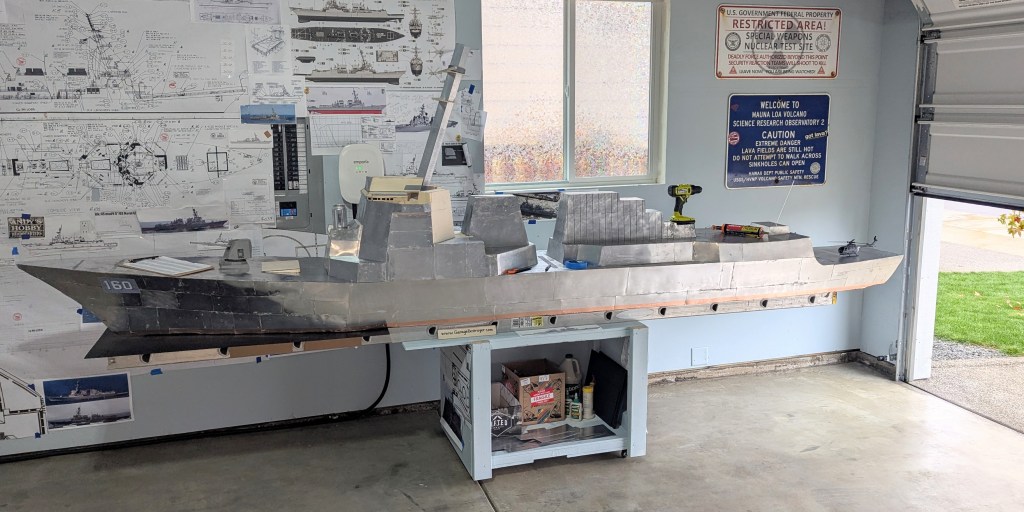
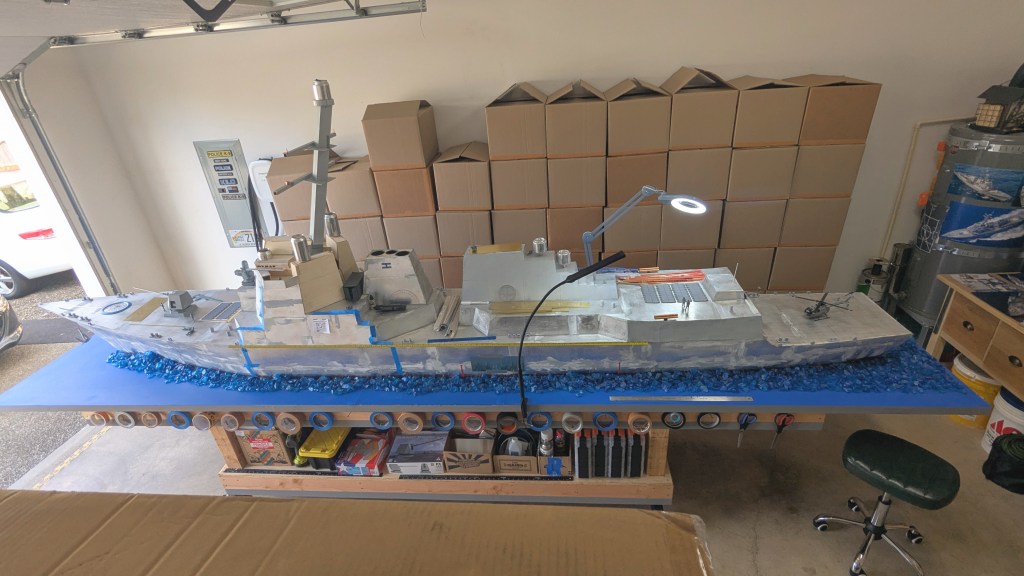
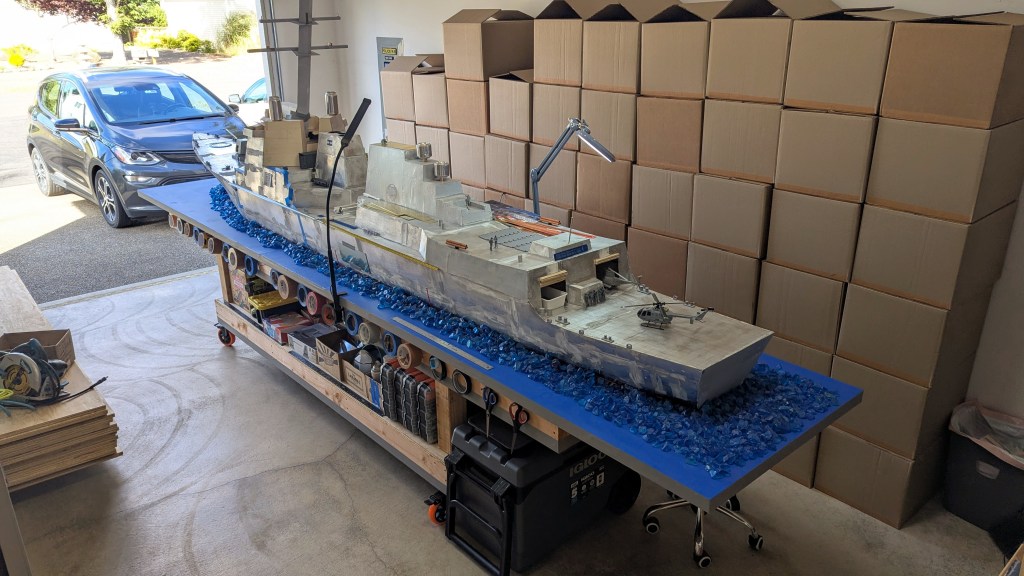
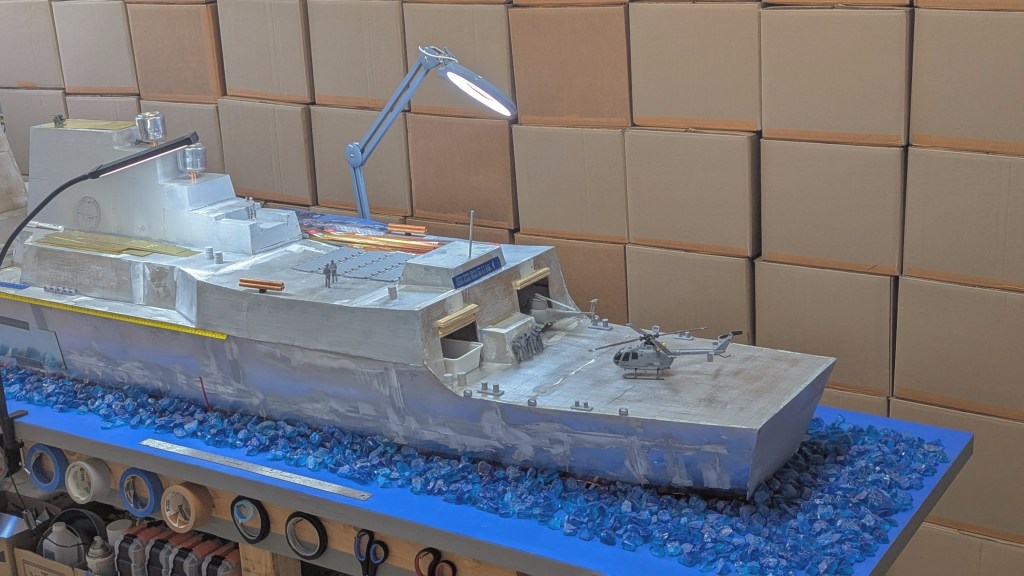
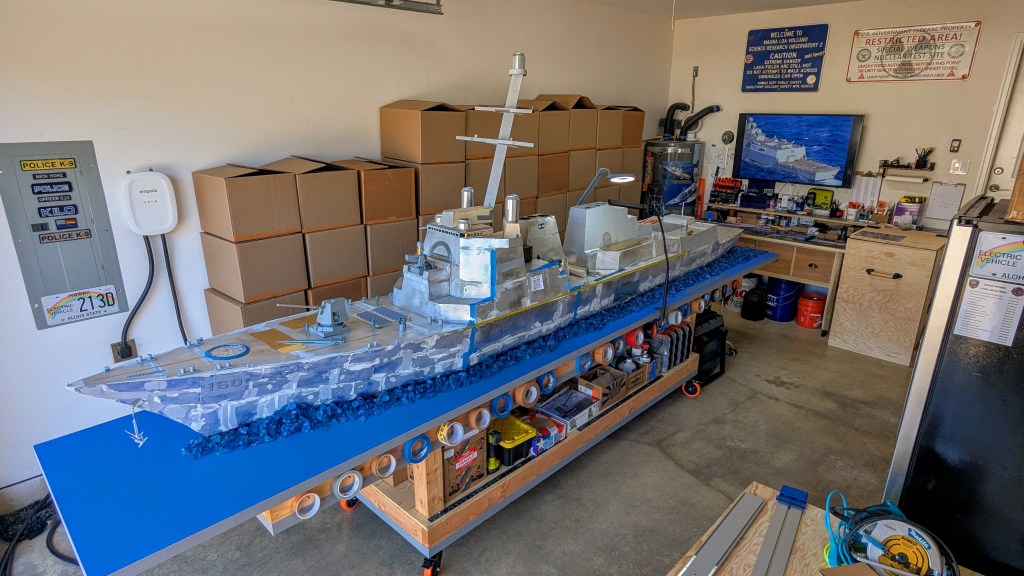
Das boot hull 160 has been relocated successfully and without incident from Tehaleh to much closer to Taholah on the Washington state part of the Pacific Ocean. Yeah, I had to rent a truck with a 20-foot long enclosed cargo deck just to move this thing. Specifically we're settled in permanently at Ocean Shores, a misty coastal beach town that now has more model destroyers in garages than it has intersection lights. Literally. Speaking of lights, this new shipyard here has excellent lighting that includes windows in the garage door and two ceiling LED panel lights, and two bulbs in the overhead door opener. And two spot lights for fine detail work, one being a magnifying lens on an XL swing arm because shit is going to start getting serious and my PRK wore out years ago. The garage destroyer is nicely snuggled and established into its new special outfitting shipyard, which for most folks would be used for parking a car but there's only enough space here for one small car. Or one big boat. Not both. So now the car now lives outside. Yes my trophy wife and significantly better other half is still with me. She’s just the best. And yes this is a new work table. I used old surplus commercial fire resistant doors (solid, level af and ridiculously heavy!) that I got from a surplus door store. Then I went to the crushed blue glass store for some artistic simulated wake, until I think of something better. The worktable is 16 feet long, built right with screws and 2x6 & 4x4 framing lumber and 3/4" plywood, slapped together on a rainy June day. I wasn't going to sand it anyway. Son of Frankenbench commands attention; when it was just a few days old a delivery driver saw it dominating my garage and he got fixated enough to readily accept my invitation to study it up close, which he did.. at arms length.. and with such a strong target lock on the worktable chassis and wheels he asked me what I was going to use the table for. Then he looked up. Noticed the ship for the first time in front of his face and just about fell over backwards. Side note: It is not easy trying to photograph this thing.
It's too big to turn around in here; I'll have to wheel it outside for maneuvers. Under the flat hull of the model and on top of the new table I arranged strips of thick foam gasket material to help cushion from vibrations and bumps.
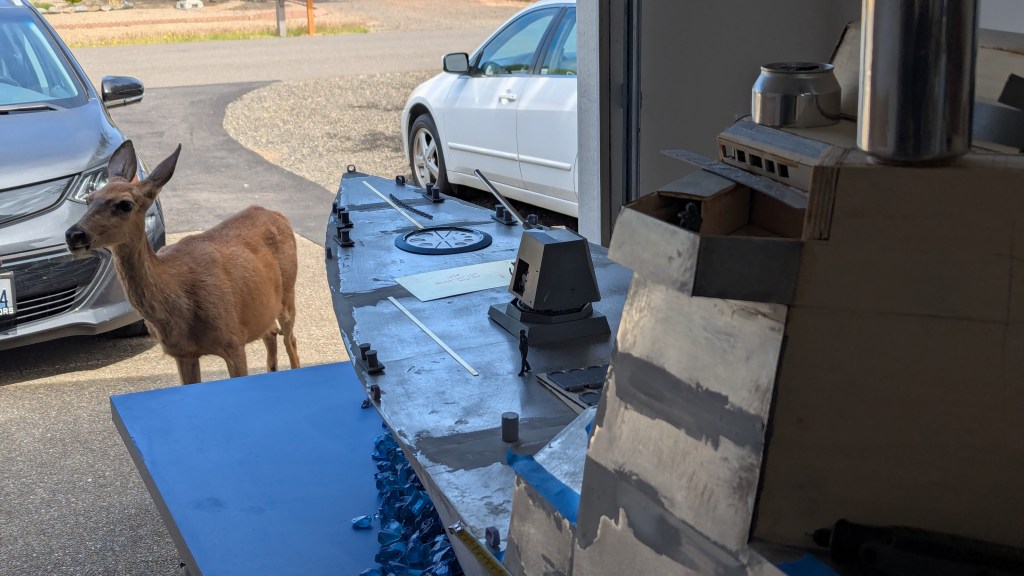
The ship, the ship's builder, and the ship's sponsor made a strategic downsize move to a super chill quiet neighborhood that is on a small island patrolled by canal river otters that is on a peninsula saturated with Columbian black tail mooch deer and there are currently adorable little spotted fawns bouncing around just everywhere. The loudest never-ending ambient sound here is the not-too distant surf of the Pacific Ocean on a beach long enough and wide enough to be driven on. Tens of thousands of drivers do it successfully every year, hundreds fail. I can hear the surf from inside my catio. It sounds like a far off giant waterfall. Nature's OG white noise machine. Competing sounds are some of the 130+ different species of birds that live or migrate through here. At night, it's frogs. And sometimes bears knocking over garbage bins. Very nature. Much quiet. Such calm. Great vibe. Also it turns out that the geography and location of this area are conducive for random military overflight training missions, most of them are C-17 Globemasters, CH‑47F Chinooks and UH-60 Blackhawks from Joint Base Lewis McChord's 16th Combat Aviation Brigade/1st Battalion/229th Aviation Regiment. From the south, on the Oregon side of the Columbia river there's an army and air force west coast training base and also the Astoria USCG air station. So.. I still got that going on overhead. That's okay, I love helicopters. Full disclosure: Yes July 4th here is a little noisy when a notorious beach (only) fireworks event that is six miles long starts an hours long barrage that becomes sustained and constant starting in the late afternoon and leaves behind 12 tons of trash for a cleanup crew in the morning. For the hearing impaired, I can describe it as sounding like a forward fire base in active engagement from 2 clicks back: small arms fire, outgoing mortar rounds, and outgoing artillery (popopopWHUMPpoppopBOOM) while far off thunder echoes and the bubble wrap factory and popcorn factory both go up in flames in a crescendo that lasts a few hours. My three cats gave zero fucks and slept through it all unperturbed. Because they're Hawaiian, from three different Hawaiian islands; one from Maui, one from Oahu, and one from the Big Island. Some people collect souvenir shot glasses or t-shirts, we collect shelter cats. The other 364 days a year here are absolutely serene, which is why I call my place Tranquility Base.
In my first month here about a couple dozen of my new neighbors stopped by to visit and geek out and gawk at this thing up close and ask questions, having heard from others that "there's a battleship in that garage!" or to see if it is indeed a rumored giant long arm quilt making sewing machine. All are welcome. I've gotten used to seeing cars drive by slowly and stop in the middle of the road; sometimes people get out and point and ask for a closer look. It's kind of entertaining to see not just men but some women walk around it, sometimes they're just about speechless.
Some just quietly stare. And judge. This one's okay. She's one my dozen or so new deer friends.
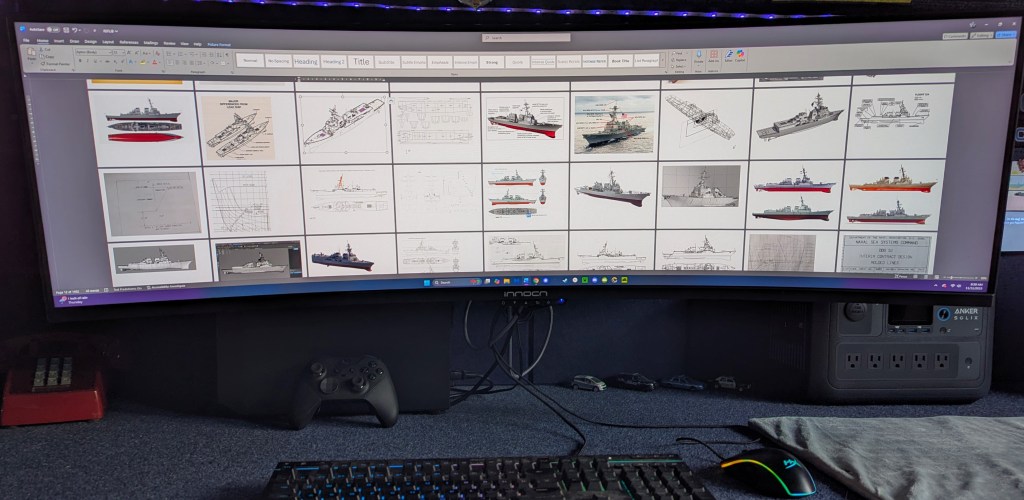
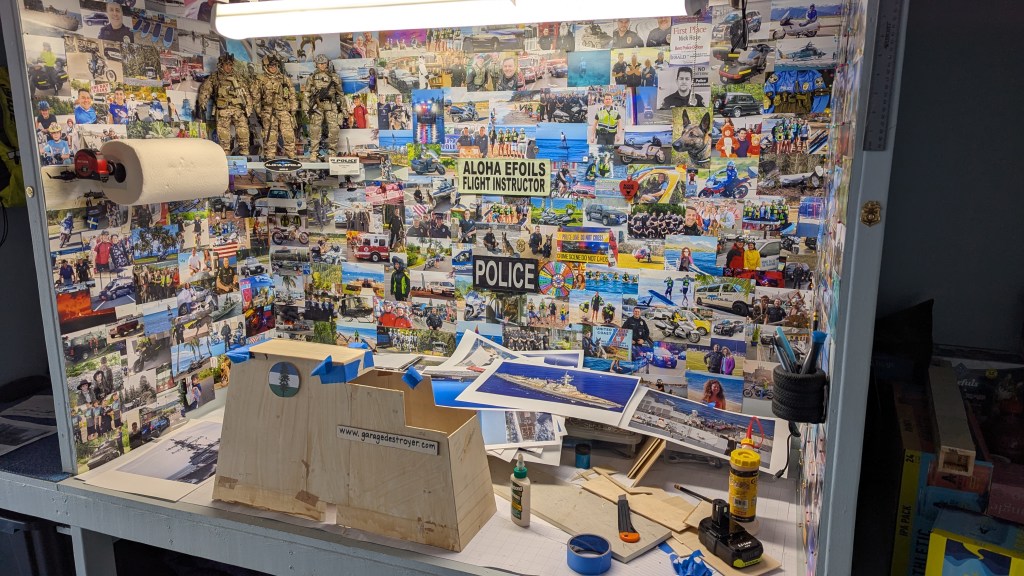
Tranquility Base Shipyard has a large monitor screen for displaying reference photos. This was one of those ideas that I had thought of pretty early on as being maybe useful to have, and it absolutely is. I have over three thousand of my best curated DDG photos sorted and categorized, so when I want to work on say, an area between frames 210 and 300, starboard side, 01 level, I can study a few photos of that area from a number of different ships, in different lighting conditions, angles, and distances. I am also pleased to report that this garage has a normal hot water heater that does not blow out cold air, so this man's cave is going to be warm this winter and progress will progressively progress. To my foreign visitors, I offer a sincere apology to your browser translators that have to decipher all of this.
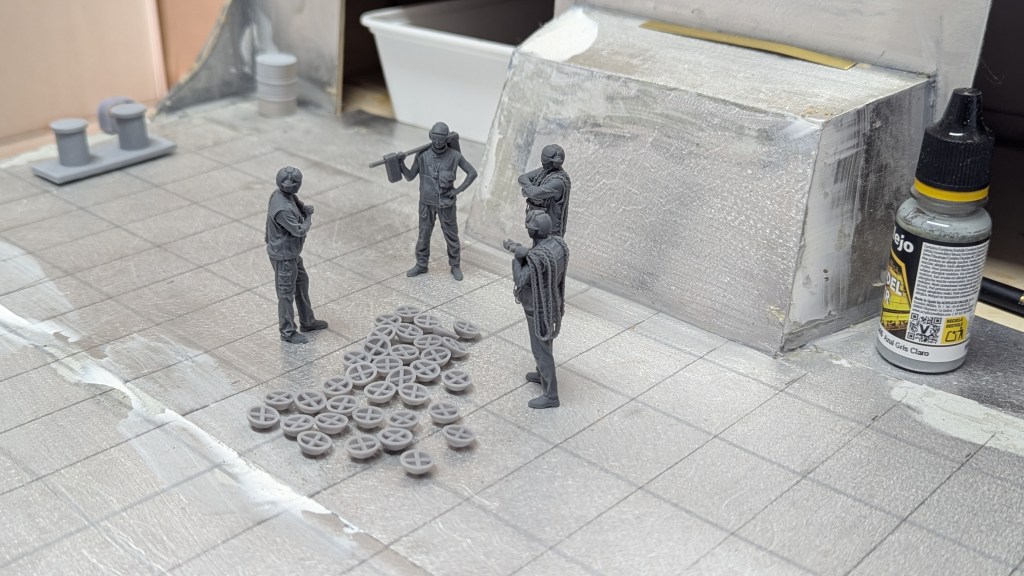
July 2026:  Construction started one year ago. For its first birthday das boot received a special custom made batch of 96 VLS canister lids.
My continuing efforts at accurately replicating scale mil-spec deck non-skid are slowly improving as I experiment with materials and techniques.
My original estimate of this being a three year project is holding steady. I hope to finish it before an apocalypse.
Some of my new flight deck anchor point padeyes awaiting installation. There's going to be a lot of precision hole drilling.
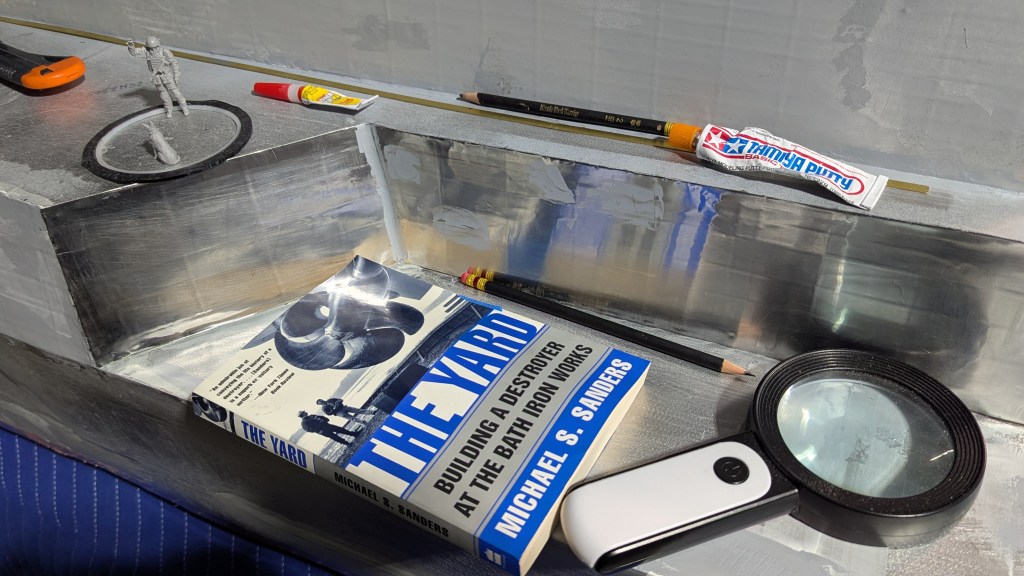
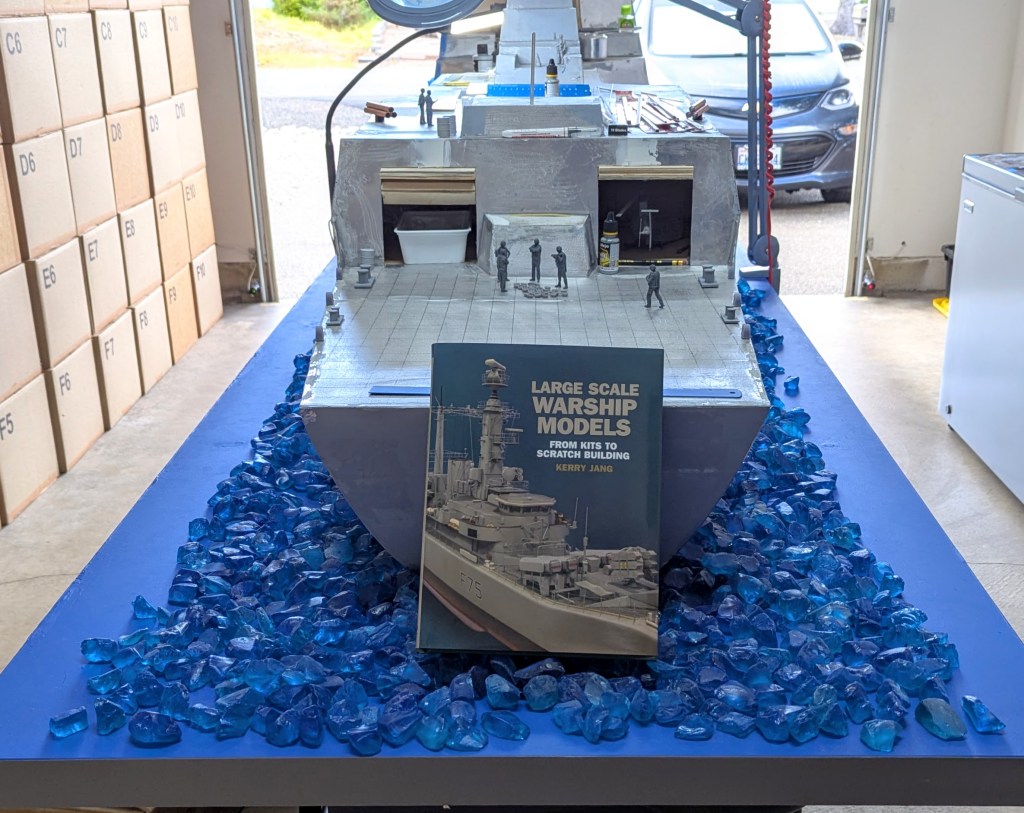
Excellent book. None of the models in here are quite as big as this thing though.
















 THE GARAGE DESTROYER